Under 4 ft: DIY Retaining Wall on a Slope, Includes Site Estimate
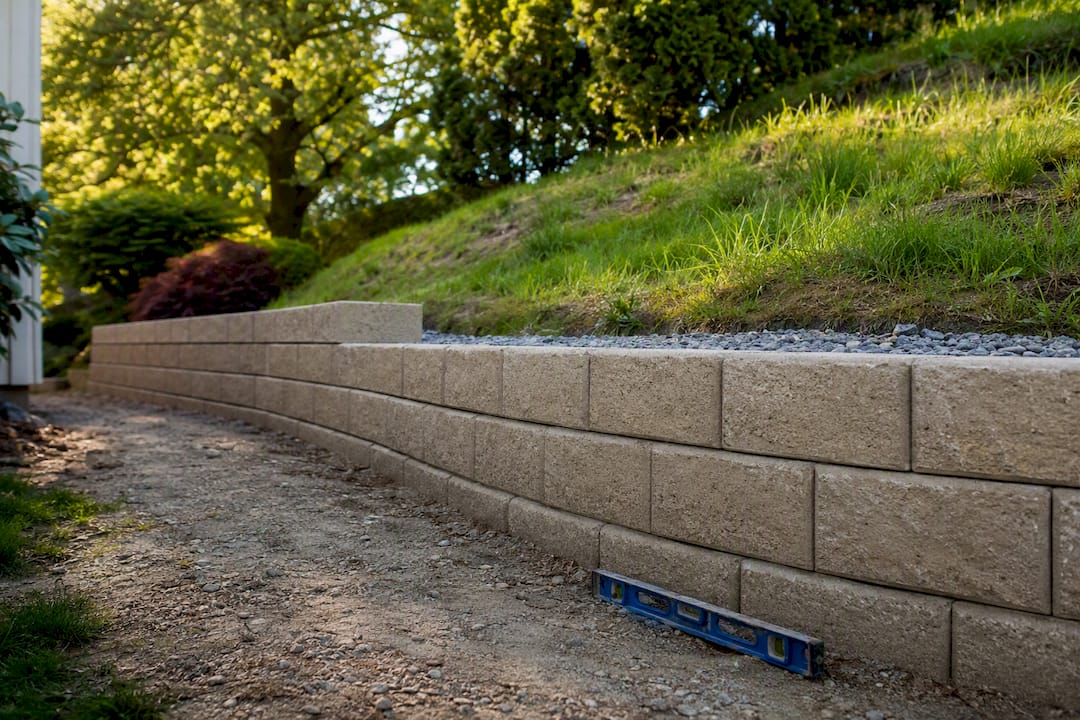
For most residential slopes, a stepped segmental block wall or a low timber cribwall with proper drainage handles the job safely and affordably. Poor drainage causes the majority of DIY wall failures, not weak materials. Once a retained section climbs past about 4 feet, or carries a driveway or patio surcharge above it, manufacturer engineering guidance says it’s time to bring in a structural engineer.
TL;DR:
- Walls above 4 feet or with surcharge loads, such as driveways or patios, require professional engineering review and proper footing design.
- Proper drainage, including perforated pipes and gravel backfill with filter fabric, is critical to prevent water pressure from causing failure, especially on slopes.
- DIY-friendly materials like segmental concrete blocks and timber are suitable under 3 to 4 feet, but taller or more complex walls should be built with reinforcement and possibly by contractors.
- Sloped sites demand stepped or terraced wall designs, precise site assessment, and careful sequencing during construction to ensure stability.
- When planning a retaining wall, measuring slope details, soil type, and drainage pathways inform accurate cost estimates and contractor communications.
Table of Contents
- Which wall type fits your slope and goals
- Step-by-step build plan for a sloped retaining wall
- When to hire an engineer and key stability checks for slopes
- Compare common materials and methods for sloped retaining walls
- Exactly how to manage water on a sloped retaining wall
- Permits, realistic timeline, and budgeting guidance with estimator pointers
- How Property Improvement Estimator helps you plan a retaining wall on a slope
- Common homeowner errors and realistic DIY limits
- Get a site-specific estimate and contractor packet
- Sources
Which wall type fits your slope and goals
Height is the first filter, but it’s not the only one. A wall retaining 2 to 3 feet of slope gives you room to experiment with materials and design. Push past 6 feet and you’re managing forces that can shove a poorly built wall right off its footing.
- Under 3 to 4 feet: Timber, dry-stacked block, or basic segmental concrete units work fine here, and this is the sweet spot for a first DIY wall.
- 4 to 6 feet: Segmental block with geogrid reinforcement is the standard DIY-friendly option, though many homeowners bring in a contractor at this height.
- Over 6 feet: Poured concrete, mortared stone, or engineered segmental systems take over, and an engineer should size the footing and reinforcement.
Space matters almost as much as height. A stepped or terraced design (a series of shorter walls instead of one tall one) eats up more yard depth but cuts the lateral load on each individual wall dramatically. If your soil is heavy clay, stays soggy after rain, or your wall sits below a driveway, treat those as red flags regardless of height. Clay swells when wet and adds pressure a sandy-soil calculation won’t predict, and a driveway surcharge above the wall changes the engineering math entirely.
Step-by-step build plan for a sloped retaining wall
Building on a slope means the ground itself works against you unless you plan the sequence correctly. Here’s the order that actually works.
- Assess the site. Measure the total rise and run of the slope, call 811 to have utility lines marked before you dig, and watch where water naturally flows during a rainstorm. Note whether your soil is sandy, loamy, or clay heavy, since that affects both drainage design and how much the wall needs to resist.
- Lay out the wall and plan your steps. On a slope, you can’t dig one continuous trench at a single depth. Manufacturer installation guidance from Allan Block recommends starting excavation at the lowest point of the slope and digging level trench sections, stepping the base up as the grade rises. Each step should align with a full or half block height so your courses stay level.
- Excavate and set the gravel base. Dig each stepped trench section to the same depth relative to its own grade, typically the block height plus 6 inches of compacted crushed stone. The trench at the low end of the wall will naturally be deeper than the trench at the high end, since it’s carrying more retained soil above it.
- Install and level the first course. This is the step people rush, and it’s the one that ruins walls. Bury the first course below grade, tamp the gravel base until it’s rock solid, and check level constantly across each stepped section, not just within one section. This Old House’s masonry guidance treats a level, buried first course as the single biggest factor separating walls that last from walls that lean.
- Stack subsequent courses with proper setback. Most segmental block systems have a built-in batter, a slight backward lean of about 1 inch per foot of height, which helps the wall resist the soil pushing against it. Stagger vertical joints between courses the way you’d stagger brick.
- Add geogrid where the design calls for it. For walls over roughly 3 feet, geogrid fabric gets laid between courses and extends back into the retained soil, anchoring the wall into the slope behind it rather than relying on the blocks’ weight alone.
- Backfill with drainage in mind. Place a perforated pipe at the base of the gravel zone, wrap it or line the trench with non-woven filter fabric, and backfill with clean crushed stone in lifts of 8 to 12 inches, compacting each lift before adding the next.
- Cap and grade the top. Install the cap course, then slope the soil at the top of the wall away from it so surface water runs off rather than soaking straight down into your backfill.
Pro Tip: Dry stack the first two courses without adhesive and walk the line with a level before committing to anything permanent. It takes twenty extra minutes and it’s the cheapest insurance against a wall that’s off by an inch at the far end.
When to hire an engineer and key stability checks for slopes
Global stability is the concept most DIYers never hear about until something goes wrong. It refers to the entire slope, wall included, failing as one mass, which can happen even when the wall itself is built correctly if the soil beneath and behind it is unstable.
The common DIY ceiling sits around 4 feet of retained height. Beyond that, industry guidance treats walls between 10 and 15 feet, depending on surcharges and site conditions, as full “tall wall” territory requiring formal engineered design. But height isn’t the whole story: a 3-foot wall on a steep slope near a driveway can demand as much engineering scrutiny as a 6-foot wall on flat, stable ground, according to technical guidance from the Canadian Mortgage and Housing Corporation.
Run through this checklist before you break ground:
- Does the retained height exceed 4 feet at any point along the wall?
- Is there a driveway, patio, structure, or road load sitting above the wall?
- Does your soil test as clay-heavy, saturated, or previously disturbed fill?
- Is the wall within 10 feet of a foundation, septic system, or property line?
- Does your region see meaningful seismic activity?
A yes to any of these means a call to a licensed engineer before you order materials.
Compare common materials and methods for sloped retaining walls
Every material trades off cost, lifespan, and how much slope it can handle.
- Timber: Cheapest option and easy to work with, but expect 15 to 20 years of service life before rot sets in, best kept under 3 to 4 feet.
- Segmental concrete block: The DIY sweet spot for most residential terraces. Interlocking units, no mortar required, and a lifespan of 50 years or more when drainage is done right.
- Mortared stone and poured concrete: Higher upfront cost and usually contractor territory, but these handle tall, engineered walls and last generations.
- Live cribwalls and vegetated systems: A niche fit for erosion control on gentle grades. Bioengineering research caps these around 5 to 6 feet and notes they aren’t built to resist major lateral earth pressure the way a rigid wall is.
Geogrid or soil anchors become necessary with segmental block once you clear roughly 3 feet, and they’re standard practice on nearly every engineered poured concrete or mortared stone wall regardless of height.
Exactly how to manage water on a sloped retaining wall
Water pressure behind a wall, not the soil itself, is what pushes most retaining walls over. Get the drainage detail right and everything else gets easier.
- Run a perforated drain pipe along the base of the wall with perforations facing down, sloped slightly toward a daylight outlet or drainage system.
- Backfill with at least 12 inches of clean, crushed gravel directly behind the wall, and wrap the gravel zone in non-woven filter fabric so soil fines can’t migrate in and clog the pipe. Drainage-focused guidance treats this fabric layer as non-negotiable on any wall meant to last.
- Grade the soil at the top of the terrace so it slopes away from the wall, and tie any nearby downspouts into the same drainage system instead of letting them dump next to the footing.
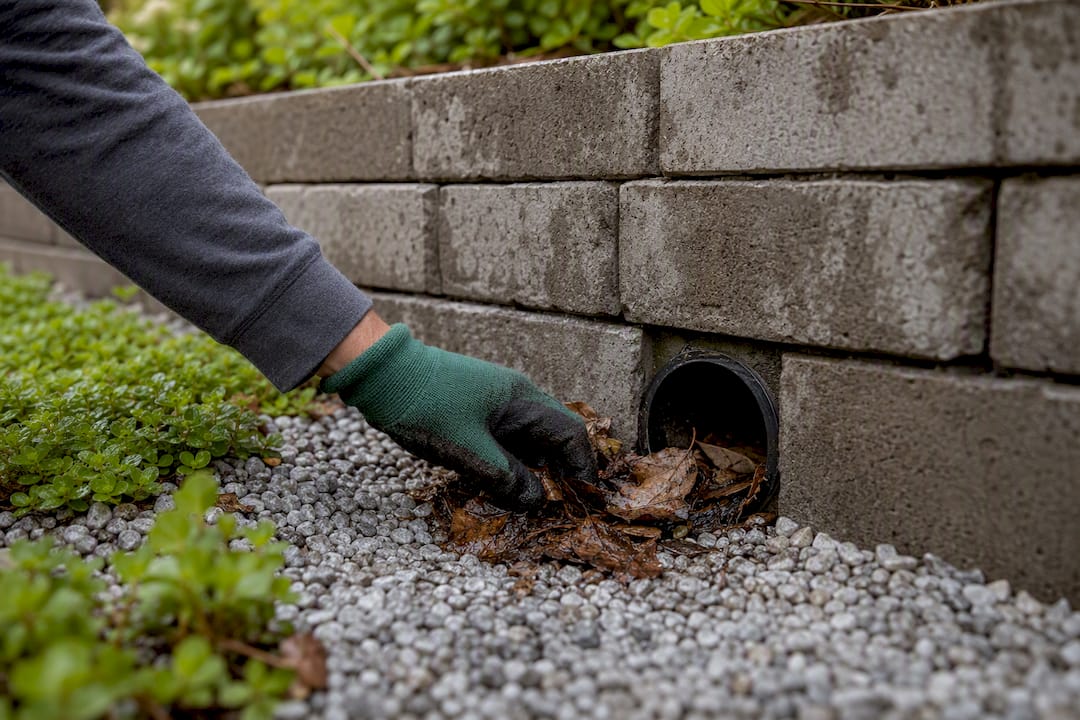
Pro Tip: Mark your drain outlet location clearly during construction, ideally with a visible pipe cap. Buried, forgotten outlets are the reason most homeowners never know their drainage system clogged until the wall starts to bulge.
Walk the outlet every fall and after major storms to clear leaves and sediment before they back up the system.
Permits, realistic timeline, and budgeting guidance with estimator pointers
Many jurisdictions require a permit once a wall exceeds 3 to 4 feet in retained height, and some count the height differently if there’s a slope above the wall. Check your local building department and your HOA before you dig, since HOA rules on wall height and materials are often stricter than the local code.
Timeline-wise, a small DIY wall (under 3 feet, 20 to 30 feet long) usually runs 2 to 4 weekends including excavation, stacking, and backfill. Larger or engineered walls with curing and inspection stages can stretch into weeks.
Budget drivers stack up fast: material choice, drainage complexity, engineering fees if triggered, and site access. Sloped sites typically run 20 to 40% more than flat-ground equivalents because of stepped excavation and taller sections at the low end.
- Check material costs for block, timber, or stone before committing to a design.
- Estimate permit and review fees tied to your wall’s height and location.
- Get a quick ballpark with the retaining wall cost calculator before requesting contractor bids.
How Property Improvement Estimator helps you plan a retaining wall on a slope
Property Improvement Estimator lets you draw your wall directly onto a satellite view of your own property, so the length, height changes, and slope direction all come from your actual yard, not a generic template. The retaining wall estimator turns those measurements into a dimensioned plan and localized cost estimate.
Wall length and height drive most of the cost, but slope steepness, soil type, and where your drainage needs to daylight all shift the number too. Measure your slope, map it, generate the estimate, then send contractors the packet directly.

Common homeowner errors and realistic DIY limits
Skipping drainage is the mistake that ends careers of otherwise well-built walls. Poor compaction of the base and backfill runs a close second, and underestimating what a driveway or patio surcharge does to lateral pressure is the error homeowners don’t see coming until the wall bulges. DIY makes sense under 4 feet on stable soil with no surcharge. Past that, or near any structure, call a professional.
— Christian
Get a site-specific estimate and contractor packet
You’ve got the build sequence down. What you don’t have yet is a number that reflects your actual yard, not a national average that ignores your slope and soil. This is a fast way to turn a hand-sketched plan into a dimensioned layout and a localized cost range before you ever call a contractor.

Have a few things ready before you start: the approximate length and height of the wall, a sense of where water currently drains across the slope, and a couple of photos of the site. Draw the wall on the satellite map, and the estimate tool builds out a line-item cost breakdown along with rough permit and engineering cost ranges based on what you’ve mapped. From there, you can send that packet straight to local contractors instead of describing your slope over the phone and hoping they picture it correctly.
Sources
For deeper technical detail, consult Allan Block’s stepped installation guide, Belgard’s segmental wall best practices, and a structural engineering checklist for wall failure modes.
- Segmental retaining walls best practices (Belgard commercial)
- Building a Retaining Wall on a Slope by Stepping Up the Base Course (Allan Block)
- How to build a retaining wall (This Old House)
Recommended
- Retaining Wall Estimate Calculator | Height, Drainage, Excavation, and Local Factors
- Retaining Wall Cost Calculator | Height, Drainage, Soil, and Local Costs
- Retaining Wall Labor Cost Calculator | Height, Excavation, Drainage, Backfill, Access, and Local Wages
- Retaining Wall Material Cost Calculator | Block, Timber, Stone, Drainage, Geogrid, and Local Factors