Pool Placement Planning: How to Choose the Right Spot in Your Yard
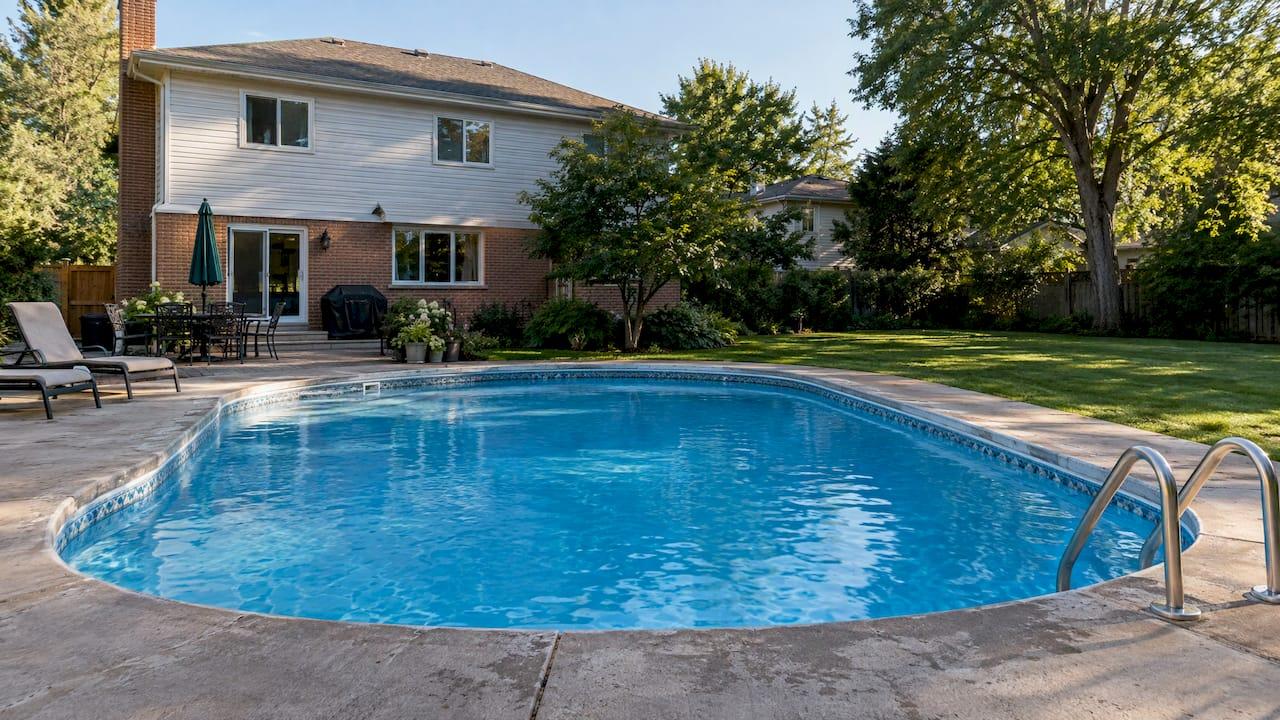
The best spot for a pool is flat, drains away from the water, gets afternoon sun, stays clear of trees and utilities, sits inside your local setbacks, and leaves room for decking, equipment and a code-compliant barrier. Settle those constraints first and the layout nearly draws itself. Pick a spot first and you often find out later, with an excavator already on site, that it doesn’t work.
This guide walks through the decisions in the order that saves the most money: what the land allows, what the rules allow, how much room you need, and how you want the pool to connect to the house.
TL;DR
- Start with limits, not looks: setbacks, easements, utilities, slope, soil and drainage decide where a pool can go before style does.
- Plan for the whole footprint. Deck, walkways, equipment and the safety barrier usually take as much room as the water itself.
- Sun matters for comfort and heating costs, and trees matter for roots, debris and shade, so think about how they will look in 20 years.
- Local rules differ by city and county. Confirm setbacks, permits and barrier requirements with your building department before you finalize a plan.
- Draw the pool, deck, fence and equipment on a scaled aerial map, so contractors bid on the same scope.
Table of Contents
- Start with what the land and the rules allow
- Check sun, wind and shade
- Think about trees for the next 20 years
- Slope, soil and drainage
- How much space the whole pool area needs
- Pool placement ideas for different yards
- Setbacks, barriers and permits
- What to put on your placement plan
- Our perspective
- Map your pool placement before you ask for quotes
- FAQ
- Sources
Start with what the land and the rules allow
Most people begin by asking where the pool would look best. Start by asking where it is allowed and buildable. Two checks narrow the options quickly.
The paper check. Find your property lines, easements and setbacks. Pool installation guides consistently tell homeowners to review local building codes for setbacks, easements, variances and utilities before choosing a location. Your city or county planning office, or the building department in places like Boise County, Idaho or St. George, Utah, can tell you the exact numbers for your zone.
The ground check. Walk the yard and look for the flattest area with room for equipment to get in. The same guide advises looking for level space, drainage that runs away from the pool, wide access for excavation equipment, and a sunny area with few trees. Also avoid building on fill dirt. Another installation guide suggests keeping a 10-foot opening into the yard so equipment and materials can get through, which rules out some back yards that look roomy from the patio.
Before anyone digs, call 811, the national Call Before You Dig number, so buried lines are marked. Overhead power lines matter too. Pool guides advise against installing a pool under them, so note where they run on your map.
Check sun, wind and shade
Sun is the one factor you can’t change after the pool is built. A pool placed to catch strong afternoon sun generally stays warmer on its own and cuts heating costs, while one tucked into a shaded corner may need more mechanical heating. The reverse is a real concern in hot climates. Pool builders also note that heavy shade from trees and buildings can make swimming uncomfortable in cooler months and raise heating costs, while too much sun can be unbearable at the height of summer.
A practical way to test this: decide when your household will actually swim. If it’s after work and on weekends, afternoon and early evening sun matters most. Our guide on matching swim hours to pool orientation walks through that logic with cost in mind.
Wind is the quiet variable. Prevailing winds push debris toward one end of the pool, so installers consider them when they place skimmers and returns. Note the usual wind direction on your site sketch and share it with your builder.
Think about trees for the next 20 years
Trees are the most common regret in pool placement. A pool guide from one retailer warns that a sapling 15 feet from the pool can be 40 feet tall in 20 years, with roots that reach under the shell. Excavating near mature roots often means removing the tree. Another guide suggests keeping pools 8 to 10 feet from trees as a baseline.
For each tree near your candidate spot, ask three questions:
- How big will it be in 20 years, and where will its roots reach?
- Does it drop leaves, needles, fruit or seed pods into the water?
- Does it shade the spot you most want sunny?
Wooded edges and shade also bring insects. If your yard backs onto trees or standing-water areas, it helps to know what you’re dealing with, for example by reading up on woodland pool mosquitoes when you decide how close to the tree line the seating area goes.
Slope, soil and drainage
Water has to go somewhere, and it should not go into your pool. Installers recommend keeping the pool deck three to four inches above the highest ground elevation nearby so surface runoff doesn’t flow back in, and the pool walls need to rest on undisturbed soil.
Soil changes both stability and cost. According to one pool retailer’s prep guide, sandy soils drain quickly but shift more, clay holds water and can swell or contract, loam is generally the most forgiving, and rocky soil is stable but expensive to excavate. The same guide treats standing water that lingers more than 24 hours after rain as a sign of drainage trouble. Walk the yard the day after a storm and photograph where water collects.

If your yard slopes, the pool can still work, but grading, retaining walls and a taller deck on one side change both layout and price. We cover the options in building a pool on a sloped yard. A soil or geotechnical assessment from your pool contractor settles what the ground can carry.
How much space the whole pool area needs
The water is only part of the footprint. Add decking, walkways, seating, equipment and the barrier, and the total area is far bigger than the pool itself. Pool builders give a few useful rules of thumb, which vary a bit by company and by how you plan to use the space:
| Element | Common starting guideline |
|---|---|
| Walking-only deck | About 4 feet clear around the pool |
| Lounging zone | 8 to 10 feet where loungers sit |
| Dining area | About 18 feet square for a table and chairs |
| Filter and pump pad | At least 2 by 3 feet |
| Pad with heater or chlorinator | At least 3 by 6 feet |
The deck figures come from Gallardo Custom Builds, which also notes that the safety barrier sets the outer edge of everything around the pool. The equipment pad sizes come from Royal Swimming Pools, which also suggests a minimum of 4 feet of deck on each side and 8 feet on each end of a rectangular pool as a starting point. Another builder describes 3 to 4 feet as a practical clear area, 6 feet as more comfortable, and an extra 8 to 12 feet on one side for entertaining.
A quick example: a 16 by 32 foot rectangular pool has a water surface of 512 square feet. Add 4 feet of walking deck on each side and 8 feet on each end, and the deck-plus-water footprint comes to 24 by 48 feet, or 1,152 square feet, before you add a dining area, equipment pad or fence offset. That is why a yard that feels big can turn out to be tight.
Planning a dining or lounge zone next to the water? Ideas like these outdoor dining ideas at home can help you picture how much table, walkway and serving space you really need beside the deck.
Equipment deserves its own spot. Keep the pad close enough to the pool to hold plumbing runs down, accessible for service, and out of the main view. Our note on equipment pad size and service clearance explains why to leave a few extra inches for maintenance.
Pool placement ideas for different yards
Once the constraints are clear, you’re choosing among the locations that survive. Here is how the main options compare.
| Placement | What works | Trade-offs |
|---|---|---|
| Close to the house | Easy access to kitchen and bathrooms, visible from indoor rooms, shorter and cheaper utility runs | Takes the patio space, can shade or crowd the house |
| Toward the rear property line | Keeps a central lawn, creates a destination feeling | Longer plumbing and electrical runs, harder to watch from windows |
| Off-center | Gives depth and a better view from the house | Needs careful setback and easement checks |
The house-versus-rear comparison comes from Epic Water Shapes. A few other principles help in any yard:
- Views from inside. Stand at the kitchen window and the main living area. A pool you can see is a pool you use, and it is easier to supervise children.
- Privacy. Place the pool and seating where neighbors’ windows and second stories don’t look down on it, and use fencing, walls or planting that doesn’t drop debris into the water.
- Narrow or small lots. A long, narrow rectangle often fits better than a freeform shape, and a pool close to the house leaves the most usable lawn. See our pool layout ideas for yards from under 800 square feet to estates.
- Walk paths. Keep a clear path from the house door to the pool and from the pool to the bathroom, and avoid routing it across the pool’s equipment or garden beds.
- Future projects. If you might add a deck, a shade structure or a sport court later, leave room for it now.
Setbacks, barriers and permits
Rules vary by town, so treat every number below as an example of what to ask about, not as your requirement. Setbacks are measured from property lines and structures, and they are different in every jurisdiction:
- Haverhill, Massachusetts requires pools to be at least 5 feet from lot lines and structures and outside the front yard setback, with a 4 to 6 foot fence and locking gate.
- San Antonio, Texas specifies 5-foot side and rear setbacks measured from the inside wall of the pool waterline, and does not permit pools in front of the property.
- Limerick Township, Pennsylvania requires pools at least 10 feet from rear and side yards and prohibits front-yard pools.
- Frederick, Maryland calls for at least 3 feet from side and rear lines and 6 feet from any structure.
The spread, from 3 to 10 feet, is the reason you should never copy a number from another city. Septic systems add another constraint. Haverhill, for example, requires in-ground pools to be at least 10 feet from septic tanks and 20 feet from leaching fields, so locate any septic components or wells on your plan.
Safety barriers also shape the layout, because the fence becomes the outer edge of the pool area. The U.S. Consumer Product Safety Commission’s Safety Barrier Guidelines for Residential Pools recommend a barrier at least 48 inches high, a bottom clearance of no more than 4 inches (less on grass, pebbles or mesh), and openings too small for a 4-inch sphere. Pedestrian gates should open outward, away from the pool, be self-closing, and have a self-latching device. Your local code may be stricter, and your building department decides what applies. Broomfield, Colorado, for instance, applies the same outward-opening, self-closing, self-latching gate rules and measures the 48-inch height on the side facing away from the pool.
Permits are usually required for in-ground pools. Even small above-ground ones can be covered: the Village of Newark, New York requires a building permit for pools capable of holding 24 inches of water, while San Antonio exempts only prefabricated, fully above-ground pools under 24 inches deep and 5,000 gallons. Electrical work often needs its own permit from a licensed electrician. For the process, read what permits you need for a swimming pool, and for the budget side, try our pool permit cost calculator.

What to put on your placement plan
A good plan is a scaled drawing, not a sketch on a napkin. Building departments ask for one with the permit application. The City of Live Oak, Texas, for example, requires a scaled site plan that shows existing and proposed structures, decks, pool equipment and fencing, property lines and setbacks, easements, electrical poles and underground and overhead electric, and septic systems, wells, propane and gas locations. Frederick, Maryland asks for site plans showing distances from the pool to property lines and structures and the location of the required barrier.
You can gather the same inputs before you talk to anyone. Use this list:
- Property lines, with the setback distances for your zone.
- Easements and utility lines, both buried and overhead.
- The house, garage, patio and any existing deck, with distances to the pool.
- Pool length, width and planned depth.
- Deck and walkway areas, including any dining or lounge zone.
- Equipment pad location and the shortest plumbing route.
- Fence and gate locations, including the gate swing.
- Trees, slope direction, wet spots and the construction access route.
- Septic, well and propane or gas locations, if you have them.
Next, test one or two layouts against your sun and view notes, and change them before anyone breaks ground. A moved line on a map costs nothing, but a moved excavation costs real money.
Our perspective
Most pool bids go wrong before the first dig, and the cause is almost always the same: the contractor priced a generic pool, not your yard. A pool in the corner with a fence line, a retaining wall and a long equipment run is a different project from the same pool on level ground near the house.
That is why we built our platform around the map. When you draw the pool, deck, fence and equipment pad on aerial imagery of your own property, you see right away whether the deck fits, whether the barrier crowds the lot line and whether the equipment run is long. The dimensions you draw feed a planning estimate adjusted for local costs, with no account required.
We think the better order is: map first, estimate second, quotes third. Contractors then receive drawings, measurements and photos instead of a phone description, and homeowners get quotes that match the real scope.
Christian
Map your pool placement before you ask for quotes
Our Pool Estimator lets you draw the pool, deck, fence and equipment locations on a satellite map of your property. It returns a locally adjusted planning range based on your dimensions, so you can compare layouts before committing to one.

When the layout looks right, you can send the drawing, measurements and photos to local contractors as a single quote request. To explore cost drivers first, the pool cost calculator covers type, depth, excavation and equipment. If a deck or fence is part of your plan, the Deck Estimator and Fence Estimator work on the same map. For a bigger picture of timing and steps, see our pool construction planning guide.
FAQ
How far should a pool be from the house?
There is no single national number. Setbacks from structures are set locally, and examples range from 3 to 6 feet in some cities to much more in others. Your building department can give you the figure for your lot, and your builder will also consider foundation clearance and excavation.
Where is the best place for a pool in a small yard?
Usually closer to the house, where it keeps the most lawn intact, shortens plumbing runs and is easy to see from inside. A long, narrow rectangular shape often uses a small lot best. Check that the 4-foot deck and the barrier still fit inside your setbacks.
How much of my yard should the pool take up?
A common rule of thumb is that the pool takes roughly a third of the backyard, though yards and uses vary. What matters more is that the deck, equipment pad, barrier and access path all fit around it. Measure the total area and draw it to scale.
Do I need a permit before choosing a pool location?
You should talk to your building or planning office before finalizing the location, because setbacks, barrier rules and permits all depend on where the pool goes. Most in-ground pools need a permit, and some places also require one for large above-ground pools.
Can I put a pool on a slope?
Often yes, with grading, retaining walls or a raised deck on the downhill side. These add to the cost and need to be on the plan, so mark the slope direction and elevation changes on your map before you request bids.
Sources
- Step 3: Swimming Pool Layout
- Comprehensive Pool Buying Guide
- How to Design a Swimming Pool That Fits Your Yard
- Inground Pool Guide
- Guide: How to Prepare Your Yard for Pool Installation
- How Much Space Do You Need Around a Pool?
- How Much Decking or Patio Do I Need Around an Inground Swimming Pool?
- How Much Pool Deck Space Do You Need?
- Best Backyard Pool Placement Tips for Homeowners
- Pool Permits and Pool Fence Enclosures, City of Haverhill
- Swimming Pool Permit Application, City of San Antonio
- Safety Barrier Guidelines for Residential Pools, CPSC
- Swimming Pool Requirements, Village of Newark
- Checklist: New Residential Pool Review, City of Live Oak
- Woodland pool mosquito identification
- Outdoor dining ideas at home