Phased Project Planning for Outdoor Projects: A Homeowner's Guide
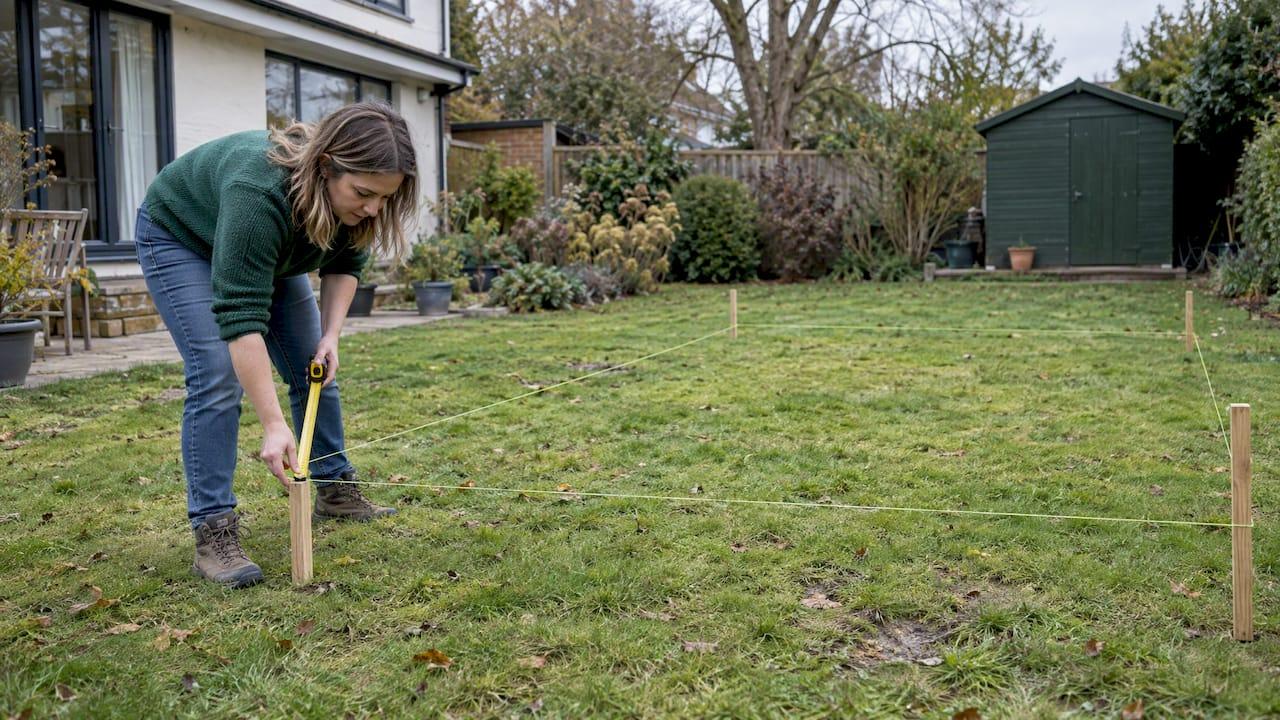
Phased project planning means drawing the whole outdoor project first, then splitting it into stages you can price, schedule and build one at a time. The order matters more than the speed: ground work, drainage and structures come first, and finishes come last. Done this way, you spread the cost over seasons without paying twice for work that later phases would have torn up.
This guide walks through the steps for a homeowner: define the project, map the site, divide it into phases, budget each one, check permits, and manage changes between phases.
TL;DR
- Plan the entire yard on paper or on a map before you build anything, even if you only build one piece this year.
- Sequence the work from the ground up: site prep, grading and drainage, then walls and paths, main living areas, utilities, and finishes last.
- Budget each phase separately and add a contingency, especially where grading or excavation is involved.
- Give every contractor the same measured scope so bids can be compared line by line.
- Check permit rules with your city or county before each phase, not just the first one.
Table of Contents
- What phased planning means for a yard or backyard
- Step 1: Define the project before you phase it
- Step 2: Map the site and record what is already there
- Step 3: Divide the work into phases and put them in order
- Step 4: Budget, schedule and contingency for each phase
- Step 5: Check permits and inspections before each phase
- Step 6: Monitor progress and handle changes between phases
- Perspective: why we start with the map
- Plan your phases with a map and real dimensions
- FAQ
- Sources
What phased planning means for a yard or backyard
In office project management, the lifecycle runs through initiation, planning, execution, monitoring and closure. Those are the pages that rank for this phrase, and the logic carries over to your property. The difference is scale: a backyard project rarely needs a formal charter, but it does need the same discipline of deciding what you want, where it goes, what it costs and what order it happens in.
The federal land-management agencies publish planning guidance that shows how scale works. The Interagency Visitor Use Management Council framework says the time and resources you put into planning should match the project’s complexity and the consequences of the decisions. Some projects take one person a few hours. Others take large teams several years. A new fence is closer to the first. A yard with a retaining wall, a patio, a pool and lighting is closer to the second, and that is where phasing pays off.
There are three common reasons homeowners phase a project:
- Budget. You can fund one stage per season instead of borrowing for everything.
- Technical order. Some work has to come before other work, such as excavation before patios and wiring before surfaces.
- Learning the site. Watching how water moves across your lot through a few weather cycles can change where permanent features should go.
That last point is worth stressing. A hardscape contractor’s guide to phasing describes phasing as a technical necessity as well as a money strategy, because it gives you time to observe drainage before committing to permanent features.
Step 1: Define the project before you phase it
The planning stage of an outdoor project starts with questions, not shovels. The U.S. Forest Service’s Sustainable Recreation Site Design Guide begins by defining the need, the desired outcome, the scope and the success criteria. It then moves to site investigation, review of applicable laws and requirements, design alternatives, and a schedule with milestones and a preliminary cost estimate. You do not need a government-sized process, but the sequence translates well to a home lot.
Write down answers to these before you draw anything:
- What problem are you solving? Not enough usable space, a steep slope, a fence that fails, no shade, no safe play area.
- What does done look like? A deck that seats eight, a flat sport court, a pool with a safe fence, a lawn that handles less water.
- What is the total wish list? Include everything, even items you will not build for years.
- What is the ceiling for each year? A realistic annual figure decides how big each phase can be.
The Forest Service Handbook, Planning and Design of Developed Recreation Sites, says a project proposal should explain what, why, where, when and how, and that a needs assessment should describe the gap between existing and desired conditions. That is a useful way to write your own one-page brief. If you can fill in those five words in plain sentences, you are ready to map the site.
Planning is also iterative. The same Forest Service guide notes that you should revisit earlier assumptions when site analysis or alternatives turn up new information. If your slope turns out steeper than you thought, the patio you pictured may need a wall, and that changes the phases.
Step 2: Map the site and record what is already there
A phased plan is only as good as the site information behind it. The Forest Service Handbook says a site inventory should document physical, biological, cultural and recreational characteristics, problems and potential, so you can judge suitability and constraints. On a residential lot, that translates into a short checklist.
- Dimensions. Lengths and areas of every planned element: fence runs, deck footprint, pad size, wall length and height.
- Slope and grade. Where the ground drops, where you would need cut and fill.
- Water. Where runoff goes during heavy rain or snowmelt, and where it pools.
- Access. Gate widths, side yards and overhead lines that limit equipment, which affects labor time.
- Existing features. Trees, sprinklers, buried utilities, septic or well locations, easements and setbacks.
- Soil. Rocky ground, clay or fill can change excavation costs.
- Photos. Date-stamped pictures of the yard before work starts.
The Forest Service also advises choosing locations that meet your objectives while minimizing extra site work and infrastructure. In yard terms: put the deck where the ground is already reasonably level and drained, not where you will pay to rebuild the terrain.
This is where a map-based tool earns its keep. With our Property Improvement Estimator, you draw fences, decks, pools, pads, courts, lighting and walls directly on satellite imagery of your property. The measurements come from your drawing, so every phase starts from real dimensions rather than guesses. If you want a walkthrough of the drawing step, our guide to planning a backyard layout with map-based estimates covers it, and the DIY backyard project planning tools guide explains the options for visualizing layouts.
Step 3: Divide the work into phases and put them in order
The CMHA, a trade association for concrete masonry and hardscape, advises in its article on developing a phased plan for backyard construction that homeowners create a complete plan first. Then they prioritize major excavation, retaining walls and foundations, primary patio or deck spaces, and infrastructure needed for later phases. Robert Bowers, CMHA’s VP of Engineering for Hardscapes, makes the practical case: planning the whole project can spare you from tearing up a finished phase to run electrical or plumbing for a later one.

A contractor’s blog on phasing outdoor projects lays out a typical residential hardscape sequence: site preparation, grading and drainage; access and structural work such as walls and paths; main living areas such as patios; utilities and rough-ins; and finishing layers such as planting and decorative features.
Here is how that looks as a working template.
| Phase | Typical work | Why it goes here |
|---|---|---|
| 1. Foundation | Clearing, grading, drainage, excavation, utility trenches or conduit for later phases | Everything else sits on it, and it is the most disruptive work |
| 2. Structure | Retaining walls, footings, fence lines, paths, driveway or pad base | Holds the ground in place and sets access |
| 3. Main space | Deck, patio, pool shell, sport court or concrete pad | The feature you wanted the most |
| 4. Systems | Lighting, wiring, irrigation, equipment | Easier once the main surfaces and trenches are planned |
| 5. Finish | Planting, mulch, furniture, decorative elements | Least likely to be damaged by later work |
Two rules keep this table from becoming rigid:
- Run infrastructure early even if you use it late. If you want lighting or a pool in phase 4, lay conduit or leave access during phase 1.
- Group work that needs the same equipment. If a wall and a patio both need an excavator, doing them together can save mobilization time.
If drainage is your first phase, our yard drainage plan guide shows how to map and budget it. If walls are involved, see how to map retaining wall drainage before you choose materials. For a deck, preparing your yard for a new deck lists what to clear and check first.
Seasonal timing
Phases also follow weather. In Idaho and Utah, where we operate, freeze-thaw winters and hot dry summers affect when you can pour, excavate or plant, so ask local contractors what their windows are. One backyard renovation guide warns that a full makeover in a single season can blow budgets and that contractors can get hard to book by late summer. Booking the next phase early, in the off-season, is a simple way around that.
Step 4: Budget, schedule and contingency for each phase
Treat each phase as its own small project with a scope, a cost, a start window and a finish milestone. The Interagency framework recommends an action plan that assigns roles, identifies resources available and needed, and sets schedules, milestones and deliverables. For you, “roles” means who is doing what: which phases are contractor work, which are yours, and who pulls permits.
A practical approach:
- Get a site-specific range first. Use a planning estimate built from your actual dimensions and local costs to see which phases fit your yearly ceiling. Our local project report is built for this.
- Request written bids. A deck planning guide from a remodeler suggests getting written estimates from two or three contractors, comparing proposal details, and using written schedules with milestones.
- Add contingency. The same guide suggests 10%. A yard renovation checklist recommends 10 to 20% where unforeseen conditions such as poor soil, buried debris or unexpected rock could appear, especially with grading or excavation. A simple rule: use the low end for fences and surface work, the high end for earthwork.
- Carry unspent contingency forward. If phase 1 finishes under budget, the leftover funds phase 2.
A worked example
Suppose your total wish list is a drainage fix, a retaining wall, a deck and landscape lighting, and you want to spread it over three years. Sample budgets are placeholders for your own figures, not typical prices:
- Year 1: drainage and grading, plus conduit for lighting. Contingency at the high end because it is earthwork.
- Year 2: retaining wall and deck footings, then the deck itself if the budget allows.
- Year 3: lighting fixtures, planting and finishes.
Each year gets its own bid, its own contingency line and its own milestone list. Nothing in year 2 digs up year 1.
Compare bids by scope, not total
The yard renovation checklist above makes a point worth repeating: comparing bids means analyzing scope rather than total price, because a low bid that leaves out haul-away, soil amendments or drainage work often ends up costing more. The easiest way to see this is to give every contractor the same measured drawing and ask them to price against it. The change order process explained for trade contractors shows how scope gaps become extra charges once work starts, which is exactly what a clear written scope prevents. For a step-by-step method, read how to compare contractor bids and what a landscaping scope of work should include.
Step 5: Check permits and inspections before each phase
Rules vary by city and county, so the right move is to call or visit your local building or planning department before each phase and ask what applies. Do not assume a permit decision for phase 1 covers phase 3.
To see how specific these rules get, look at Portland, Oregon. The city’s residential permitting guidance for fences, decks and outdoor projects says permits are required for decks more than 30 inches above grade, detached patio or porch covers over 200 square feet, and retaining walls over four feet or affected by a slope or structure. Your own city, in Boise County, St. George or elsewhere, will have its own thresholds, so use Portland as a sign of the kind of question to ask, not as your rule.
Questions worth asking the building department:
- Does this phase need a permit on its own, or does it count as part of a larger project?
- Are there setback, height or easement rules for fences, walls and structures?
- Which inspections are required, and at what stage?
- Do pools or lighting need separate electrical or safety approvals?
For decks, the remodeler’s guide above suggests scheduling check-ins after footings are poured, when framing is complete and before decking covers the structure, and confirming that the final inspection passed. Build those into the phase schedule so inspections do not delay the next stage.
Step 6: Monitor progress and handle changes between phases
Changes are normal in multi-year projects. A phased plan makes them cheaper, as long as you record them.
- Use milestones. For a deck, the same remodeler suggests monitoring at footing and framing stages.
- Photograph each stage. Photos of trenches, footings and buried conduit before they are covered are useful years later when you start the next phase.
- Keep a punch list. At the final walkthrough, list anything unfinished and agree on when it will be fixed before you pay the balance.
- Ask how change orders work. Before signing, ask the contractor how scope changes are priced and approved, and get changes in writing.
- Update the master plan. If phase 2 changes the layout, redraw the full map so phases 3 to 5 still fit.
Keep a single folder with your map, bids, permits, photos and inspection sign-offs. When you return for the next phase, a contractor can see exactly what was built and where utilities run.
Perspective: why we start with the map
We built Property Improvement Estimator around a simple observation: most phasing mistakes come from not seeing the whole site at once. When you draw every fence line, deck, pad, wall and light on one aerial map, conflicts show up on screen instead of in the dirt.
Generic per-square-foot numbers cannot tell you that a slope will push your patio into wall territory, or that conduit for phase 4 should go in during phase 1. Measured dimensions and local cost data can. That is why our estimators are designed to turn your drawing into a site-specific planning range, and why we think a phased plan should always begin with that drawing.
The same drawing helps on the contractor side. A bid request with measurements, options and photos gives a contractor what they need to price your scope, so the quotes you get back are easier to compare. Phase by phase, you keep the same reference map and update it as the yard changes.
Christian
Plan your phases with a map and real dimensions
If you are ready to turn this into numbers, open the estimator for the project you will build first. Draw it on your property, see a locally adjusted price range with no account required, then add the later phases to the same map. Start with the Deck Estimator if a deck is the centerpiece, or go to the Property Improvement Estimator home page to pick from fences, pools, concrete, asphalt, sport courts, lighting and retaining walls.

When you are ready, you can send the drawing, measurements and photos as a quote request to local contractors, so each bid starts from the same scope.
FAQ
What are the steps in the planning phase of an outdoor project?
Define the need and the outcome you want, choose and inspect the site, and record existing conditions. Then review the local rules, draw alternatives, and set a schedule, milestones and a preliminary budget. Planning is iterative, so revise earlier assumptions if the site shows something new.
What should I build first in a phased backyard project?
Start with whatever the rest depends on: site preparation, grading, drainage and major excavation, followed by walls and foundations. Main living areas such as a patio or deck come next, then utilities, and finishing touches like planting go last. Lay conduit or plumbing access early for anything you will add later.
How much contingency should I add to each phase?
Sources aimed at homeowners suggest 10% as a baseline and 10 to 20% where grading or excavation could reveal poor soil, buried debris or rock. Earthwork phases deserve the higher figure. Ask your contractor which conditions could change the price.
Do I need a new permit for every phase?
It depends on your city or county, so check before each phase. Thresholds vary by project type, height, area and slope. Ask the building department whether the phase stands alone and which inspections apply.
Can I plan phases myself without a contractor?
Yes. You can measure and draw the whole project on a property map, set a budget for each phase and gather bids from there. A drawing with accurate dimensions gives contractors what they need to quote each stage.
Sources
- Sustainable Recreation Site Design Guide, U.S. Forest Service
- Visitor Use Management Framework, Interagency Visitor Use Management Council
- Forest Service Handbook, Planning and Design of Developed Recreation Sites and Facilities
- The Importance of Developing a Phased Plan for Backyard Construction, CMHA
- How to Phase Your Outdoor Project
- How to Plan a Backyard Renovation: Sequence, Budget, Timing
- How to Plan Your Deck Project: Design to Completion
- Yard Renovation Checklist: A Homeowner’s Phased Guide
- Brochure 3: Fences, Decks and Outdoor Residential Projects, City of Portland
- The Change Order Process: A Field Guide for Trade Contractors