6 to 8 ft Path Light Spacing for Homeowners: Map & Night Test
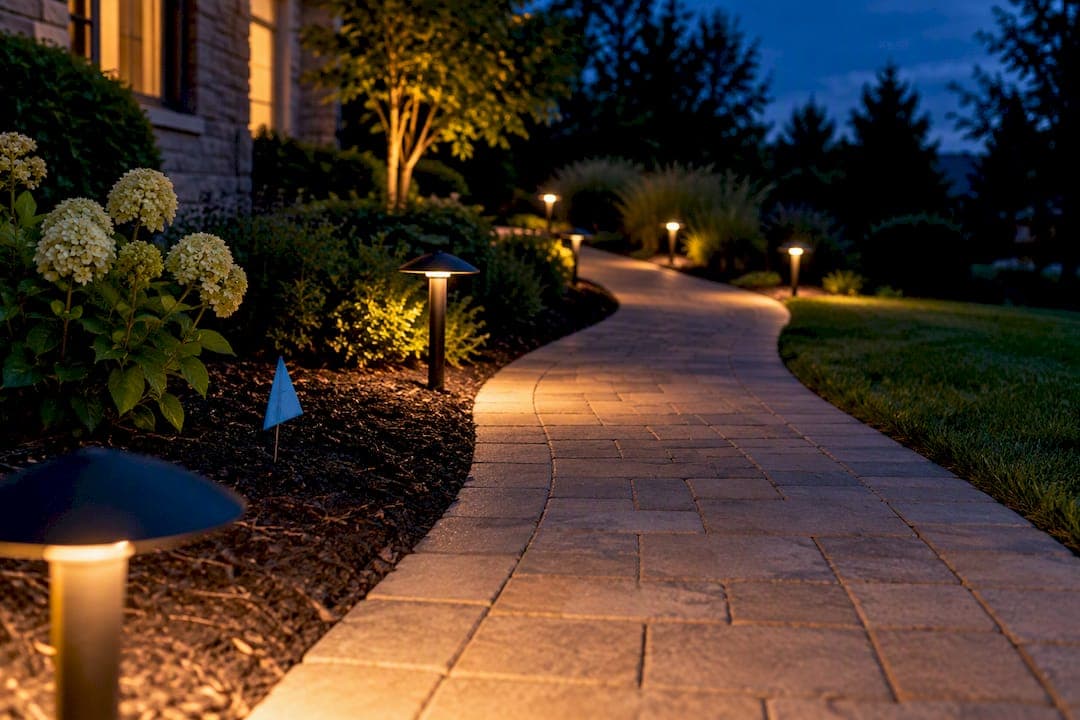
Space most path lights 6 to 8 feet apart, with 6 to 10 feet acceptable depending on brightness and layout. Tighten that to 4 to 6 feet on curves and near steps, and drop to 3 to 4 feet (or one fixture per step) on stairs and elevation changes. Only widen past 8 feet if you’re running bright, high-lumen fixtures over a wide drive. The sections below cover exactly how to adjust for your fixtures, your path, and your yard.
TL;DR:
- Most path lights should be spaced 6 to 8 feet apart for standard fixtures, with tighter spacing of 3 to 6 feet on stairs and curves for safety and visibility.
- Brightness levels influence spacing, with 100–150 lumen fixtures requiring closer placement, and 200–300 lumen fixtures allowing wider gaps.
- Proper layout depends heavily on beam angle, mounting height, and surface reflectivity, with overlapping light pools of 20 to 50 percent preventing dark gaps.
- Walking the path in the dark after installing fixtures is the best way to verify correct spacing, adjusting for glare, hot spots, or dark patches.
- Using mapping tools like satellite-based planners helps plan accurate fixture placement, avoiding overlighting or underlighting before installation begins.
Table of Contents
- Recommended Path Light Spacing by Path Type
- What Changes Your Ideal Path Lighting Distance
- Layout Patterns That Avoid the Runway Effect
- How Many Path Lights Do You Actually Need
- Installation and Night-Testing Checklist
- Planning Path Light Spacing With a Mapped Layout
- A Practical Take on Path Light Spacing
- Get a Contractor-Ready Lighting Plan Before You Dig
- Sources
- FAQ
Recommended Path Light Spacing by Path Type
The 6 to 10 foot range works for straight, flat walkways, and 6 to 8 feet is the sweet spot most landscape lighting guides land on for standard LED fixtures. That gap gives enough overlap to avoid dark patches without wasting fixtures on a path that doesn’t need them.
Other path types need their own numbers:
- Straight walkways: 6 to 8 ft typical, up to 10 ft acceptable with brighter fixtures.
- Driveway edges: 8 to 12 ft. Driveways need definition markers more than continuous illumination, so wider gaps work fine.
- Curves and garden paths: 4 to 6 ft. Tighter spacing on curves keeps the bend visible instead of disappearing into shadow between fixtures.
- Steps and elevation changes: 3 to 4 ft, or one fixture at each step. Every riser needs its own light for safety reasons that override the standard spacing math.
Placement pattern matters as much as the numbers. Straight paths usually work best with fixtures alternating side to side. Driveways typically look better mirrored on both edges, since that symmetry reads as intentional rather than random.
What Changes Your Ideal Path Lighting Distance
Four things push your spacing tighter or looser than the standard range, and brightness is the biggest one. A 100 to 150 lumen fixture needs roughly 4 to 6 feet between units to keep pools of light connected. Bump that fixture up to 200 to 300 lumens and you can stretch to 6 to 8 feet, since each light throws a bigger pool.

That pool size is really the whole game. Think of pool radius as roughly half your spacing distance. If you’re setting fixtures 8 feet apart, each one needs to throw a usable pool of light about 4 feet in radius for the pools to actually meet in the middle.
Beam angle affects that pool directly. Narrow beams create smaller, more defined pools and need tighter spacing to avoid gaps. Wide, diffused beams cover more ground per fixture and tolerate wider gaps.
Mounting height matters too:
- Rule of thumb: spacing ≈ 1.5 to 3 times the fixture’s mounting height.
- A 12 inch path light might support 3 to 4 ft of extra reach beyond its base range.
- Taller fixtures throw light farther, so they can sit farther apart.
- Path width plays in as well. Most fixtures sit 12 to 18 inches back from the path edge, close enough to light the walking surface without turning the whole lawn into a runway.
Beam overlap is the principle that ties all of this together: rather than memorizing fixed distances, aim for adjacent light pools to overlap by roughly 20 to 50% depending on your beam shape. That overlap is what prevents the dark gaps that make a path feel unfinished at night.
Ambient light and surface reflectivity round it out. A pale concrete path bounces more light than dark mulch, so you can space slightly wider on reflective surfaces. For color temperature, stick to warm 2700 to 3000K bulbs with shielded housings. Pedestrian lighting research from the Department of Energy found that warm color temperatures and glare control improve how well people perceive texture changes and trip hazards after dark, which is exactly what path lighting is supposed to help with.
Layout Patterns That Avoid the Runway Effect
Good path lighting layout comes down to a handful of habits that separate a warm, inviting walkway from one that looks like an airport taxiway.
- Stagger, don’t mirror. On narrow paths, alternate fixtures left and right rather than lining them up in matching pairs. Perfectly mirrored fixtures create that harsh runway look; staggered placement reads as softer and more natural.
- Set back 12 to 18 inches. Keep fixtures close enough to the edge that light actually falls on the walking surface, not just the surrounding grass or mulch.
- Tighten at decision points. Curves, corners, and intersections need a fixture right at the turn, not several feet before or after it, so the change in direction is obvious at a glance.
- Skip direct opposition on narrow paths. Two fixtures facing each other across a tight walkway create glare and visual clutter instead of clean illumination.
These four habits matter more on a path someone walks daily in the dark than any specific spacing number does.
How Many Path Lights Do You Actually Need
The math is simple: fixtures needed ≈ (path length ÷ chosen spacing) + 1. That plus one accounts for lighting both ends of the run, not just the middle.
Three quick examples using 6 to 8 ft spacing:
- 25 ft path: 25 ÷ 7 + 1 ≈ 4 to 5 fixtures
- 40 ft path: 40 ÷ 7 + 1 ≈ 6 to 7 fixtures
- 50 ft path: 50 ÷ 7 + 1 ≈ 8 fixtures
Add 10 to 15% more fixtures if your path curves rather than runs straight, since bends eat up spacing faster than a tape measure suggests. Steps get counted separately at their own tighter 3 to 4 ft rule. Before you buy anything, measure the actual route, mark rough positions with stakes, do a dry run, then recount.
Installation and Night-Testing Checklist
Numbers on paper never tell the whole story until you see them in the dark.
- Run a dry test first. Lay a garden hose or set temporary stakes along your planned path, then walk it after sunset before digging anything.
- Size your transformer with headroom. For low-voltage systems, add about 20% capacity beyond your total fixture wattage so the system isn’t running at its limit.
- Check your wire runs. Long low-voltage runs lose voltage over distance; if a run exceeds typical low-voltage limits, bring in an electrician rather than guessing at gauge.
- Test for glare after dark. Confirm shielded fixtures are aimed downward, and check that no light spills into neighboring windows.
- Adjust before you finalize. Move any fixture that creates a hot spot, a dead zone, or a glare point once you can actually see the layout lit up.
Pro Tip: Do your dry run on two different nights, one clear and one with fog or light rain. Glare and beam spread behave differently in each condition, and you’ll catch problems a single dry test would miss.
Planning Path Light Spacing With a Mapped Layout
Guessing at spacing from a tape measure and a mental picture is how most overlighting and dark-gap mistakes happen. A better approach: draw your actual path to scale, place fixtures at your chosen spacing, and see the layout before you buy a single light.
That’s the workflow the Outdoor Lighting Estimator is built around. Draw the path on the satellite map, choose your spacing and fixture assumptions, run the estimator, and export a plan that shows exact fixture counts and layout. Pair that with the lighting labor cost calculator for wiring and trenching labor, or the lighting permit cost calculator if you’re adding pole-mounted fixtures that might need review. Mapping to scale catches spacing errors before they become expensive change orders, and it gives contractors a plan precise enough to quote accurately the first time.

A Practical Take on Path Light Spacing
The biggest mistake I see in path lighting isn’t bad spacing math. It’s skipping the night test because the daytime layout looked fine on paper. Overlighting a short walkway wastes money and creates glare; undelighting near steps creates an actual hazard. Run the numbers, then walk the path in the dark before anything goes in the ground. If you can map the layout first, so much the better; it turns a guessing game into a plan a contractor can bid on without a second visit.
— Christian
Get a Contractor-Ready Lighting Plan Before You Dig
Propertyimprovementestimator is the alternative to eyeballing spacing with a tape measure and hoping the contractor’s quote matches what you pictured. Instead of describing your path lighting idea over the phone, you draw it to scale on a satellite map, test your spacing visually, and get a locally adjusted estimate before requesting a single quote.

The Outdoor Lighting Estimator lets you place fixtures at your chosen spacing, see the layout against your actual property, and generate a plan that reflects real dimensions and local costs, no account required. Pair it with the lighting material cost calculator to break out fixture and wiring costs separately. Once your layout looks right on screen, export it and send it straight to contractors through your local project report so every bid you get back is based on the same exact scope.
Sources
For technical depth beyond spacing charts, the Illuminating Engineering Society publishes formal pedestrian lighting standards, and Energy covers color temperature and fixture efficiency for outdoor projects. Both are worth a look before larger installations.
- Landscape Lighting Spacing Guide: Avoid Dark Gaps & Overlighting (6–10 ft Rule)
- LED Path Light Spacing: How Far Apart Should Path Lights Be? – Malory Lighting
- Pedestrian lighting report (GATEWAY demonstration) — U.S. Department of Energy
FAQ
How Far Apart Should Path Lights Be Spaced?
Most path lights work best spaced 6 to 8 feet apart, with 6 to 10 feet acceptable depending on fixture brightness. Curves and steps need tighter spacing, typically 4 to 6 feet and 3 to 4 feet respectively.
What Is the Rule of Thumb for Outdoor Lighting Placement?
The rule of thumb is beam overlap, not a fixed distance: adjacent light pools should overlap by roughly 20 to 50% so there are no dark gaps between fixtures. A rough shortcut is that pool radius equals about half your chosen spacing.
How Do I Know if My Path Lights Are Spaced Correctly?
The only reliable test is walking the path after dark once fixtures are placed or staked out. If you see dark patches between pools of light or a harsh, runway-like glare, adjust spacing or add a fixture before finalizing positions.
Does Fixture Brightness Change the Spacing I Should Use?
Yes. Lower-lumen fixtures, around 100 to 150 lumens, need tighter spacing near 4 to 6 feet, while brighter 200 to 300 lumen fixtures can stretch to 6 to 8 feet. Beam angle and mounting height affect that range as well.
Can Propertyimprovementestimator Help Me Plan My Path Lighting Layout?
Yes. The Outdoor Lighting Estimator lets you draw your path on a satellite map, test spacing visually, and generate a locally adjusted plan to send to contractors. Pricing details for related project types are available directly on the site.