Map-Based Estimates: Drought Lawn Alternatives for Homeowners
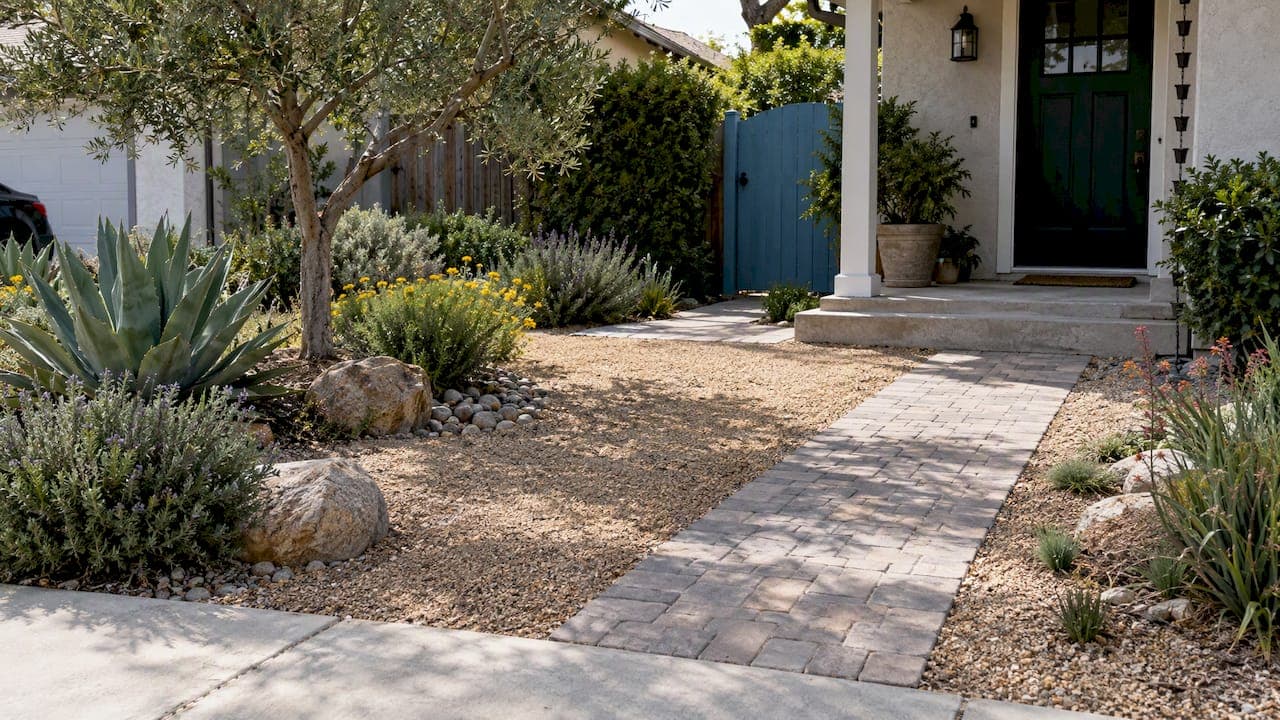
Paver or stone patios, gravel and decomposed granite areas, permeable pavers, concrete pads, and elevated decks are the built alternatives that reliably replace thirsty turf. Before any of them makes sense for your yard, measure the area, flag drainage paths, call 811 for a utility locate, and turn those notes into a site-specific estimate so contractor bids are comparable.
TL;DR:
- Proper site assessment, including slope and infiltration tests, is crucial to prevent ponding and ensure permeable systems function correctly.
- Base depth and material choice, such as crushed angular stone and layered compaction, significantly impact long-term durability and settlement.
- Permitting depends on project size and drainage modifications, and HOA approvals may impose stricter restrictions on hardscape materials and placements.
- Accurate bids require detailed measurements, site specifics, and itemized estimates, emphasizing the importance of consistent project documentation.
- Gravel or decomposed granite are ideal low-cost, drought-tolerant options for informal areas, paths, or side yards that require no irrigation and drain freely.
Table of Contents
- 1. Which hardscape option fits your yard
- 2. Checking your site before you commit to a design
- 3. How to measure and size your project correctly
- 4. What drives your quote and how to compare bids
- 5. Base depths, materials, and construction standards to expect
- 6. Turning your measurements into comparable contractor bids
- 7. Which hardscape materials are genuinely better for the environment
- 8. Common problems homeowners run into during installation
- 9. Adding drought-tolerant plants around your hardscape
- 10. Permits and HOA rules that apply to non-lawn projects
- 11. The order that saves homeowners money and headaches
- 12. How Property Improvement Estimator turns your plan into real bids
- FAQ
- Sources
1. Which hardscape option fits your yard
Each of these replacements solves a different problem, and picking the wrong one for your site usually shows up later as standing water, cracked edges, or a surface that never gets used.
- Paver or stone patios suit seating areas and walkways; they cost more per square foot than gravel but last for decades with minimal upkeep.
- Gravel or decomposed granite (DG) areas are the cheapest option and drain freely, making them a strong fit for side yards, dog runs, or informal paths.
- Permeable pavers or grid systems let water soak through the surface into a stone reservoir below, which matters where local drainage rules limit runoff.
- Concrete pads (including pervious concrete) handle vehicle loads and heavy furniture but need a thicker base and more careful jointing to avoid cracking.
- Elevated decks skip the drainage question entirely by lifting the living space above grade, which is often the right call on sites with poor infiltration or heavy clay.
Cost and maintenance track roughly together: gravel is the cheapest to install and the easiest to redo but migrates and needs occasional topping off; pavers and concrete cost more upfront and hold their place for 20 years or longer; decks sit in the middle on price but carry periodic sealing or staining.
The water impact split matters more than the price tag for drought planning. Impermeable surfaces (standard concrete, mortared stone) shed every drop of rain as runoff, while permeable pavers and pervious concrete let water infiltrate on site, which is the whole point if your goal is cutting irrigation demand without creating a runoff problem next door. Decks are a special case: water passes through the gaps to the soil below, so they behave more like a permeable surface even though no one calls them that.
2. Checking your site before you commit to a design
A hardscape plan that ignores slope, soil, and buried utilities turns into expensive rework. Walk the site with these checks before sketching anything permanent.
- Measure the slope away from your house using a level and a straightedge, or a smartphone level app; a common target is at least a 2% grade (roughly a quarter inch of drop per foot) directing water away from the foundation.
- Run a simple infiltration check by digging a test hole, filling it with water, and timing the drain. Pervious paver guidance recommends testing infiltration before committing to a permeable system, and notes these systems work best on slopes under roughly 2%.
- Confirm vertical separation from groundwater or bedrock. Permeable pavement guidance from Portland ties suitable sites to good infiltration, limited slope, and enough separation from groundwater or bedrock below the reservoir.
- Call 811 before any digging starts, and check with your local jurisdiction about permit triggers tied to drainage changes, heavy equipment, or impervious surface limits.
Pro Tip: Do the infiltration test in the same season you plan to build; soil that drains fast in August can behave very differently after a wet spring.
Skipping the slope and infiltration checks is the single most common reason a new patio or permeable driveway ends up ponding water within its first year.
3. How to measure and size your project correctly
A vague “about 400 square feet” estimate is how homeowners end up with bids that vary by thousands of dollars for the same job. Sketch the site first, then calculate.
Start with a simple site plan showing your property lines, the house footprint, downspout locations, any existing hardscape, and the access route equipment will need to reach the work area. For regular shapes, multiply length by width; for irregular areas, break the space into rectangles and triangles and add the pieces together.
- Calculate total excavation depth by adding base depth, bedding layer, and surface material thickness, since this figure drives both material orders and demolition volume.
- Note gate widths and elevation changes, since a narrow side-yard gate or a flight of steps can force hand excavation instead of machine work.
- Mark access points for a skid steer or dump trailer, since contractors price labor hours partly on how far material has to be carried.
Oregon State University Extension’s paver guide confirms this approach: excavation depth should account for base, bedding sand, and paver thickness together, and slope needs to direct water away from structures from the start.
4. What drives your quote and how to compare bids
A single dollar-per-square-foot number hides most of what actually changes a price. The real cost drivers are demolition and disposal of old turf or soil, base preparation and compaction, material choice, site access and labor hours, drainage or permitting requirements, and the level of edge and finish detail.
- Demolition and haul-away of sod, roots, and topsoil often surprises homeowners who assumed the old lawn would just disappear.
- Base prep and compaction usually separates a patio that lasts decades from one that settles within two seasons.
- Material choice swings price more than labor does on smaller projects, especially between gravel, standard pavers, and permeable systems.
- Access and labor hours rise sharply on tight side yards, sloped lots, or sites with no equipment access.
- Drainage, permitting, and engineering add cost where local rules require stormwater review for larger impervious additions.
One contractor-training resource notes that rigorous base preparation, not the surface finish, is what determines whether a patio settles or lasts, which is a useful filter when you’re comparing bids that look similar on the surface.
Ask every contractor for an itemized quote broken out by these categories, not a single lump sum, and build in a contingency of 10 to 20% for unexpected site conditions like buried debris or poor soil.
5. Base depths, materials, and construction standards to expect
A written specification should name real numbers, not just “compacted base.” For standard patios, a 4 to 6 inch compacted gravel base is typical, while vehicle-rated surfaces commonly need 6 to 8 inches, according to utility and base-depth guidance. Permeable systems go deeper: reservoir depths commonly run 4 to 12 inches depending on the product and expected load, per the NC permeable pavement manual.
The base material matters as much as its depth. Washed, angular crushed rock such as #57 stone compacts and locks together far better than rounded or dirty gravel, and fines left in the base migrate over time and clog the pore space that makes a permeable system work. Good installers compact the base in layers, or lifts, rather than dumping and compacting the full depth at once.
Edge restraints, whether plastic edging, concrete curbing, or a mortared border, keep pavers from creeping outward under foot traffic and seasonal freeze-thaw. Larger permeable driveways and any pervious concrete installation generally call for a certified installer or engineer sign-off, since getting the reservoir sizing and infiltration rate wrong defeats the whole purpose of the system.
6. Turning your measurements into comparable contractor bids
Once you have dimensions, depth calculations, and site notes in hand, assemble them into one packet: a site sketch, exact measurements, planned excavation depth, photos of the area, access notes, any permit findings, and your preferred finish material.
- Send the same packet to every bidder so price differences reflect their approach, not gaps in what they know about your site.
- Expect price variance tied to crew speed, equipment access, and how far they have to haul spoil and waste material.
- Request at least two itemized bids and compare line items, especially base prep and disposal, rather than comparing bottom-line totals alone.
A map-based estimate that shows exact project boundaries and dimensions on aerial imagery removes most of the guesswork that causes bids to vary wildly for the same job, since every contractor starts from identical numbers instead of a rough verbal description.
Pro Tip: Photograph your downspouts and any low spots in the yard before you dig; contractors use these details to price drainage work accurately instead of padding the bid for unknowns.
7. Which hardscape materials are genuinely better for the environment
Replacing turf with hardscape changes your water footprint in two separate ways: it eliminates the irrigation a lawn needs, and it changes how rain behaves once it hits the ground. Impermeable surfaces, standard poured concrete and mortared stone, shed rainwater as runoff that has to go somewhere else, often into a storm drain system already under strain during heavy rain events.
Permeable pavers and pervious concrete let water soak into the ground where it falls, recharging local groundwater instead of routing it away. Portland’s permeable pavement program frames this as a valid stormwater strategy precisely because it reduces runoff volume on-site, provided the ground underneath can actually absorb it.
Material sourcing matters too, though less dramatically than the permeable question. Gravel and decomposed granite require the least manufacturing energy of any hardscape option, while poured concrete carries a heavier production footprint than pavers made from similar aggregate. Reclaimed or local stone cuts transportation impact compared to material trucked long distances.
None of this replaces the water savings from removing turf in the first place, which is the larger win regardless of which hardscape you choose. The material decision is a secondary lever: it decides whether your new surface helps or hurts the broader water cycle around your home, not whether you’re saving water at all.
8. Common problems homeowners run into during installation
Most installation headaches trace back to one of three things: skipped site prep, mismatched materials, or unrealistic expectations about what a surface can handle.
Settling and cracking after the first winter almost always point to inadequate base depth or compaction done in one pass instead of layered lifts. The fix is prevention: specify the base depth in writing and ask how the contractor compacts it, in layers or all at once.
Clogged permeable systems are the second common failure. Fines, dirt, and leaf litter work into the gaps between pavers over a few seasons and choke the infiltration the whole system depends on. Regular sweeping or vacuuming of joint material, done once or twice a year, keeps a permeable surface working as designed.
Standing water on supposedly permeable surfaces usually means the site failed the infiltration test it should have passed before construction, or the reservoir depth was undersized for the soil type. This is why the infiltration check belongs before the bid, not after the complaint.
Uneven settling near structures often traces back to skipping the slope check. A patio built flat against a foundation wall, instead of sloped away from it, can direct water right back toward the house.
The pattern across all four problems is the same: the fixes are cheap when applied before construction and expensive once the surface is down. A short site evaluation at the start costs far less than tearing out a settled patio two years later.

9. Adding drought-tolerant plants around your hardscape
Hardscape handles the bulk of the water savings, but bare gravel or a slab of concrete rarely looks finished on its own. A few plant accents soften the edges without reintroducing a thirsty lawn.
Native and drought-tolerant plants work best in defined pockets rather than scattered across the whole yard: a planting strip along a patio edge, a cluster near a mailbox, or a bed bordering a deck. This keeps watering needs concentrated and easy to manage with drip irrigation instead of broad spray coverage.

Choose plants rated for your specific climate zone rather than generic “drought tolerant” labels, since a plant bred for coastal fog belts behaves very differently in an arid inland yard. Grouping plants by water need, sometimes called hydrozoning, keeps thirstier accent plants separate from truly low-water species so you’re not overwatering one to keep the other alive. One arid-climate guide to drought-tolerant plantings walks through this kind of zoning alongside hardscape planning, which is worth a look if you’re building out planting pockets around a new patio or gravel area.
Leave gaps in your hardscape layout, planter cutouts in a paver field, a border strip along a fence, specifically for these accents rather than trying to retrofit planting space after the hardscape is finished. It’s far cheaper to leave a 2-foot planting strip during installation than to cut one into finished concrete later.
10. Permits and HOA rules that apply to non-lawn projects
Removing turf for hardscape triggers different rules than a straightforward landscaping change, and skipping this check is how projects end up with a stop-work order mid-build.
Most jurisdictions require a permit once a project crosses a certain impervious surface threshold, adds significant square footage, or changes drainage patterns on the lot. Green stormwater infrastructure guidance from Phoenix notes that permit triggers commonly apply when heavy equipment is used or drainage is altered, and recommends mapping site features and checking with local planning before work starts.
Homeowners associations add a second layer entirely separate from city permitting. Many HOAs restrict visible gravel areas, limit the percentage of front-yard hardscape, or require pre-approval of material color and layout before installation. These rules vary enough by community that there’s no way to generalize them; the only reliable step is checking your specific HOA’s architectural guidelines before finalizing a design.
The practical sequence is: check your HOA documents first, since their restrictions are often tighter than city code, then confirm city or county permit requirements based on your project’s size and whether it changes drainage. Doing this before measuring saves you from designing a project you can’t actually build as planned.
11. The order that saves homeowners money and headaches
Locate utilities and confirm drainage before anything else. Measure and draw the full plan second, and get site-specific estimates third. Spend more on base and drainage than on surface finish if you want the project to last, and when you’re unsure, a short site design pass before bidding beats fixing change orders later.
— Christian
12. How Property Improvement Estimator turns your plan into real bids
We offer a map-based way to size this project before you ever talk to a contractor. Draw your patio, gravel area, permeable pavers, concrete pad, or deck directly on aerial imagery of your property, and we return locally-adjusted price ranges based on your exact dimensions.

- Get a shareable project packet with your measurements, map, and cost range ready to send to multiple bidders.
- Skip the account setup and generate a local project report in minutes.
- Compare specific estimators for your deck or concrete pad project before you request quotes.
Run your free estimate today and request itemized bids with the numbers already on the table.
FAQ
Is gravel or decomposed granite a good lawn alternative for drought?
Yes, gravel and DG drain freely and need no irrigation once installed, making them one of the lowest-cost options for turf replacement. They work best for paths, side yards, and informal areas rather than spaces needing a firm, even surface.
How deep does the base need to be for a paver patio?
A standard paver patio typically needs a 4 to 6 inch compacted gravel base, while vehicle-rated surfaces need 6 to 8 inches, according to utility and installation guidance. Permeable systems require a deeper reservoir, often 4 to 12 inches depending on the product, per the NC permeable pavement manual.
Do permeable pavers work on sloped yards?
Permeable systems perform best on slopes under roughly 2%, since steeper grades push water off the surface before it can infiltrate, according to pervious paver guidance. On steeper sites, a standard patio, gravel area, or elevated deck is usually a more reliable choice.
Do I need a permit to replace my lawn with hardscape?
It depends on your project’s size and whether it changes drainage, since many jurisdictions set permit triggers around impervious surface thresholds, per stormwater infrastructure guidance. Check your local planning office and your HOA’s architectural guidelines before finalizing a design.
How do I get accurate cost estimates for a hardscape project?
Measure the area, note excavation depth and access constraints, and send the same site packet to every contractor you ask for a bid. A map-based local project report that shows your exact dimensions and a locally-adjusted price range makes bids easier to compare line by line.
Sources
- 10-Step Guide to Installing Pavers (Oregon State Extension)
- Portland
- Pervious walkways and patios (NHDES Soak Up the Rain)
- Permeable pavement manual (NC Dept. of Agriculture/Soil & Water)
Recommended
- Outdoor Lighting Cost Calculator | Fixtures, Poles, Wiring, and Local Costs
- Asphalt Cost Calculator | Estimate Driveways, Overlays, Sealcoating, and Local Costs
- Pool Estimate Calculator | Type, Depth, Excavation, Equipment, and Local Factors
- Fence Cost Calculator | Estimate Materials, Gates, Height, and Local Costs