Map Your Yard Into a Bid Ready Landscape Lighting Layout for Homeowners
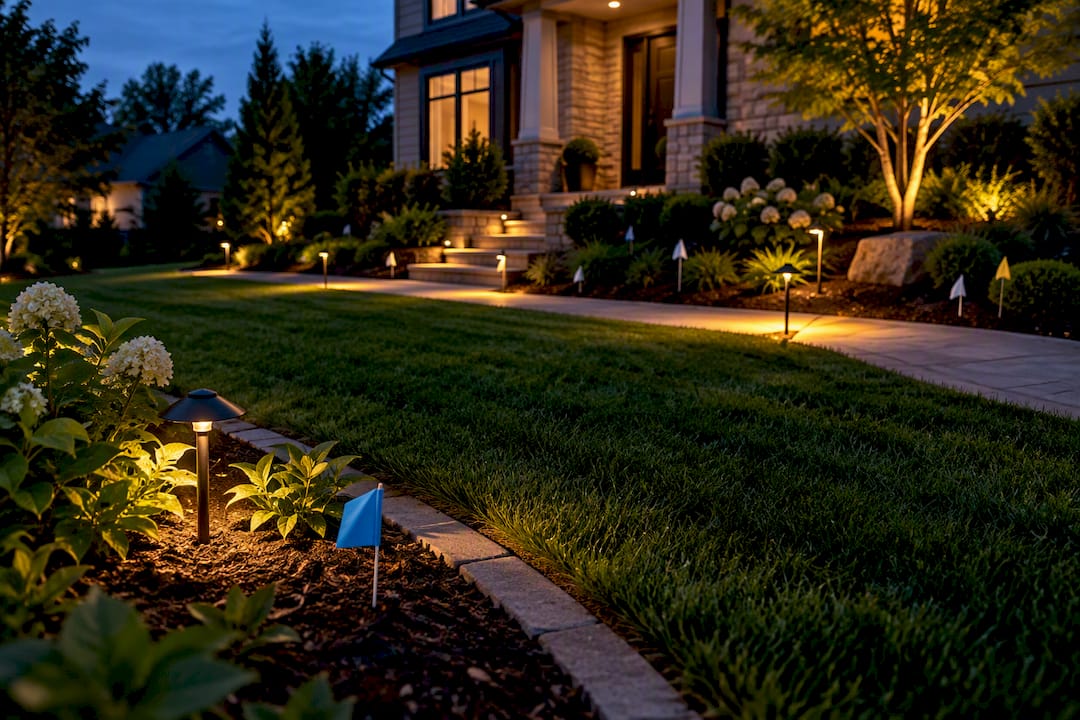
Start by zoning the yard, not by shopping for fixtures. Walk the property after dark, sketch where the entry, paths, patio, and one or two accent features need light, then mark your existing power sources before you buy anything. Prioritize safety along walkways and steps first, limit yourself to one to three focal points, and let that sketch drive every wiring and fixture decision that follows.
TL;DR:
- Proper zone mapping ensures each area has tailored lighting, with safety lighting prioritized for walkways and flickering focus points limited to avoid flat layouts.
- Sketching a scaled layout before fixture selection helps prevent overbuying and aligns the design with actual property features and utility locations.
- Fixtures should be spaced to overlap light pools, with path lights approximately 8 to 10 feet apart and uplights aimed from 3 to 5 feet away for mid-size trees.
- Selecting a transformer at 80% of total wattage and ensuring proper wire gauge mitigates voltage drop and prolongs system lifespan.
- Using mapping tools to create contractor-ready plans saves costs, shortens bidding processes, and prevents costly rework or fixture misplacements.
Table of Contents
- What Are the Main Zones in a Landscape Lighting Layout?
- How Do You Map and Sketch a Lighting Layout Before You Buy Anything?
- Which Fixtures Fit Each Zone, and How Far Apart Should They Go?
- How Do You Size a Transformer and Avoid Voltage Drop?
- What’s the Right Order for Installing Landscape Lighting?
- How Do You Fine-Tune Aiming After the Lights Are Installed?
- How Mapping Tools Turn a Sketch Into a Contractor-Ready Plan
- Plan First, Buy Fixtures Second
- Get a Contractor-Ready Lighting Plan Without the Guesswork
- Where to Read More
- Sources
- FAQ
What Are the Main Zones in a Landscape Lighting Layout?
A solid landscape lighting layout breaks the yard into distinct zones rather than treating the whole property as one lighting job. Professional designers build layouts from three layers, ambient, accent, and task lighting, then assign each layer to a physical zone with its own switch or timer. That’s the model Hammerton’s design guide recommends, and it holds up whether you’re lighting a quarter-acre lot or a small courtyard.
Here’s how the zones typically break down:
- Entry zone: the front door, house numbers, and the first ten feet of walkway, usually the highest priority since it sets the tone for the whole property.
- Pathway zone: walkways, driveways, and steps, where the job is safety first and aesthetics second.
- Entertaining zone: patios, decks, fire pits, and outdoor kitchens, where you want brighter, adjustable light for actual use.
- Accent/focal zone: a specimen tree, a water feature, a piece of architecture worth showing off after dark.
- Perimeter/security zone: fence lines, side yards, and dark corners where motion-triggered light matters more than mood.
Prioritize based on your actual goals. A family with young kids should put pathway and step lighting first. Someone who entertains on weekends should weight the patio zone heavier. Wiring each zone to its own circuit or smart switch lets you run the entry and pathway lights all night while the accent lighting only comes on when you’re actually using the patio, which saves on running costs and gives you more control than one big loop ever will.
How Do You Map and Sketch a Lighting Layout Before You Buy Anything?
Before you touch a fixture, walk the property at night with a phone flashlight and take photos of anything you’d want lit: the front walk, a tree with good branch structure, the patio steps. Note where shadows fall oddly and where existing exterior lights already do part of the job.
Then translate that walk into a scale drawing. A simple approach:
- Measure the perimeter and any hardscape (patio, driveway, walkways) with a tape measure or a laser measure.
- Draw to scale on graph paper or a digital tool, using something like 1-inch equals 8 feet for an average residential lot.
- Mark the house outline, hardscape, mature plant canopy, and utility lines, including septic fields, irrigation heads, and buried cable.
- Locate your transformer options, ideally near a GFCI outlet and within reach of your main zones without an excessively long home run.
- Note irrigation and drainage lines so trenching for lighting wire doesn’t cross a sprinkler line or a drainage swale.
A detailed landscape lighting plan that includes a scale layout, fixture schedule, and transformer location makes future maintenance and expansion far easier, and it’s the same documentation a contractor would want if you ever hand off part of the project. Doing this work before hardscape or major planting goes in avoids the classic mistake: running conduit under a patio that’s already poured.
Pro Tip: Photograph your yard from the street at dusk before you install anything. That single photo becomes your before-and-after reference, and it often reveals a focal point you’d have otherwise missed.
Which Fixtures Fit Each Zone, and How Far Apart Should They Go?
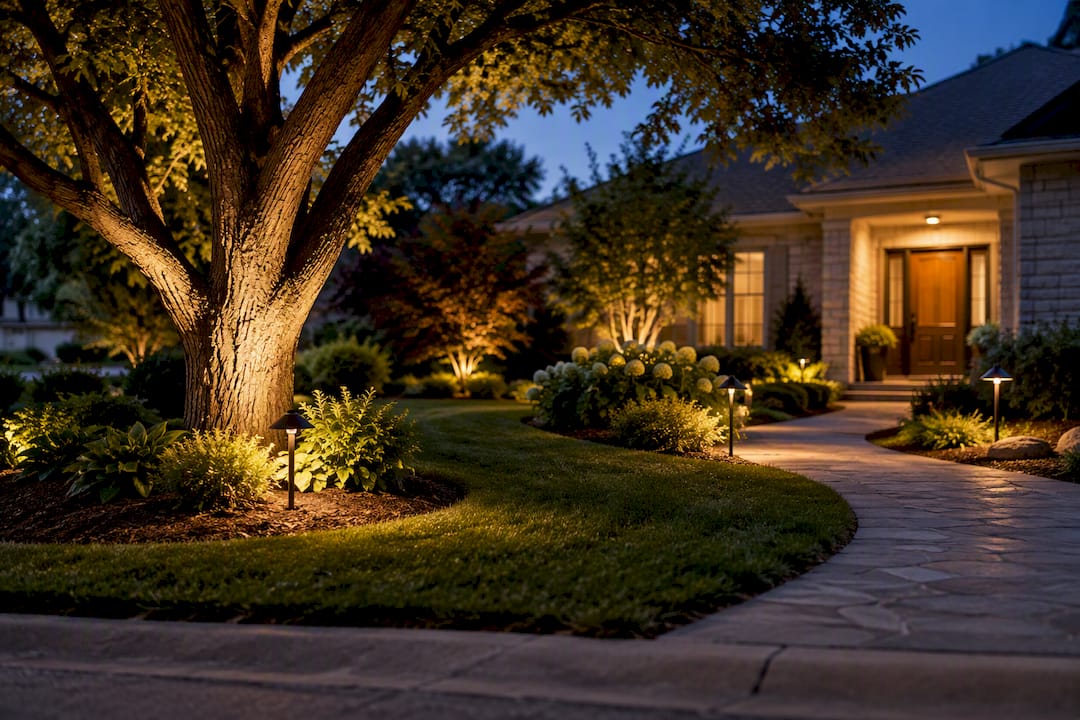
Match the fixture to the job, not the other way around. Path lights handle walkways and low borders. Spotlights and uplights highlight trees, columns, or facades. Well lights sit flush in the ground for grazing a wall or lighting from below without a visible fixture. Step lights and small hardscape fixtures mark elevation changes. String lights carry the entertaining zone, and floodlights cover the perimeter and security zone.
- Path lights: space so the pools of light just overlap, roughly 8 to 10 feet apart depending on the fixture’s beam spread, and alternate sides of the walkway rather than lining both edges evenly. Staggered placement looks more natural and typically needs fewer fixtures, a rule echoed in DIY layout guides built around the same overlap principle.
- Uplights on trees: a 25 to 45 degree beam angle usually covers a mid-size canopy from 3 to 5 feet away; wider trees need either a wider beam or two fixtures aimed from different sides.
- Well lights: best for grazing texture on stone or stucco, placed close to the surface you’re highlighting.
- Color temperature: stick to warm white, generally in the 2,700K to 3,000K range, across the entire property. Mixing warm and cool white fixtures on the same layout is one of the fastest ways to make a yard look unfinished.
Keep your focal points limited to a few features. Lighting too many elements flattens the contrast that makes a layout look designed instead of scattered, a point designers at Lumens emphasize when reviewing amateur installs.
How Do You Size a Transformer and Avoid Voltage Drop?
Most residential installs run on 12 volt low-voltage systems, which are safer to work with, cheaper to install, and flexible enough for nearly any zone layout. Line-voltage (120V) fixtures show up mainly for large floodlights or long driveway runs where low-voltage cable runs would get impractically long, and those installs usually call for a licensed electrician.
Sizing the transformer is simple math with an important cushion built in:
- Add up the wattage of every fixture on a zone, then total across all zones you plan to run from one transformer.
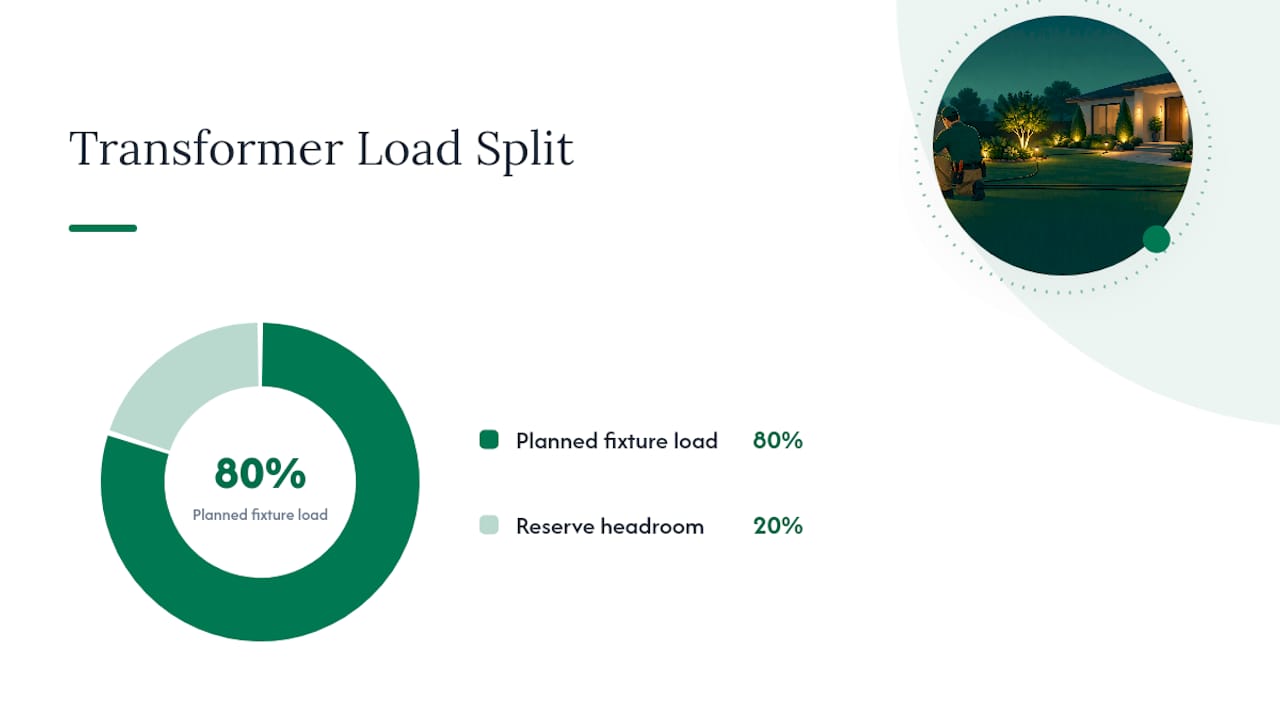
- Size the transformer to about 80% of its rated capacity. A 300-watt transformer should carry roughly 240 watts of fixtures, leaving headroom for LED driver inefficiencies and future additions.
- Watch voltage drop on long runs. Fixtures at the far end of a run often burn dimmer than fixtures near the transformer; the fix is thicker gauge wire (10 or 12 gauge instead of 14), multiple shorter home runs from the transformer instead of one long daisy chain, or splitting a long zone into two circuits.
- Protect every outdoor circuit with GFCI, inspect cords and connectors for damage each season, and use only outdoor-rated, sealed fixtures, guidance that lines up directly with ESFI’s outdoor electrical safety recommendations.
The 80% rule exists for a reason: transformers run hotter and fail faster when pushed near their rated ceiling, and LED drivers draw slightly more at startup than their steady-state wattage suggests. Building in that margin now saves you from replacing a transformer in two summers.
If any part of the plan touches your home’s main panel or requires trenching near a gas or water line, that’s the point to bring in a licensed electrician rather than push through it solo.
What’s the Right Order for Installing Landscape Lighting?
Before you dig anything, call for a utility locate, check whether your area requires a permit for low-voltage outdoor wiring, and gather your tools: a trenching shovel or spade, wire staples, waterproof connectors, a voltage tester, and your fixture and cable inventory.
- Lay out fixtures on top of the ground first, unburied, and power up each zone to confirm placement and brightness before any trenching happens.
- Trench along your planned wire routes, typically 6 inches deep for most residential low-voltage cable, deeper under any area that will see foot traffic or get tilled.
- Run conduit under hardscape crossings like driveways or patios so you can pull new wire later without breaking concrete.
- Mount the transformer near its GFCI outlet, in a location protected from irrigation spray and direct rain exposure.
- Connect each zone, test voltage at the first and last fixture on every run, and adjust wire gauge or add a home run if the drop is too steep.
- Bury the wire only after final aiming is confirmed, then secure fixtures with their stakes or mounting hardware.
This “aim first, bury last” sequence saves you from digging up wire because a fixture looked wrong once it got dark. A rough labor estimate for the trenching and electrical work helps here too. Property Improvement Estimator’s labor cost calculator gives you a range before you decide how much of the install to do yourself.
Pro Tip: Run every zone for a full test cycle, including any timers or smart controls, before you close a single trench. A transformer that trips on day one is far easier to diagnose with the wire sitting on top of the grass.
How Do You Fine-Tune Aiming After the Lights Are Installed?
Aiming is where a layout goes from functional to genuinely good, and it only happens after dark. Uplighting a tree calls for a steep angle from close to the trunk. Silhouetting works by placing the fixture behind an object and aiming at a wall or fence behind it, throwing a shadow forward. Grazing skims light up a textured surface like stone or brick from a foot or two away. Moonlighting mounts a fixture high in a tree canopy, aimed down, to mimic natural moonlight falling through branches.
- Angle fixtures so the lamp itself isn’t visible from the street, the patio, or your neighbor’s windows; a visible bulb reads as glare, not design.
- Use louvers, shields, or honeycomb baffles on any fixture that still throws light into a sightline after aiming.
- Test the layout over two or three separate evenings, since your eyes adjust differently on a clear night versus an overcast one, and note any fixture that needs a tweak.
- If the property has multiple structures, elevation changes, or a pool that reflects light unpredictably, that’s the point to bring in a lighting designer who can run formal photometric calculations instead of eyeballing it.
How Mapping Tools Turn a Sketch Into a Contractor-Ready Plan
A hand sketch gets you organized. A map-based estimator turns that sketch into something a contractor can actually bid from, with a scaled layout, a fixture schedule, transformer sizing, and material and labor ranges attached to your specific yard instead of a generic national average.
Drawing your fixture locations directly on aerial imagery cuts out the guesswork that causes mismatched quotes. Property Improvement Estimator’s Lighting Estimator lets you place path lights, uplights, and zones right on a satellite view of your property, then generates:
- A scaled map showing every planned fixture location.
- A fixture schedule and parts list contractors can quote against directly.
- A transformer sizing suggestion based on your total planned wattage.
- A material and labor cost range using local pricing data.
Handing a contractor that packet instead of a verbal description shortens the back and forth considerably, since they’re bidding on the same plan you designed, not their interpretation of a phone call.
Plan First, Buy Fixtures Second
Most lighting mistakes I see traced back to one habit: buying fixtures before mapping the yard. Someone finds a good deal on a pack of path lights and works backward from there, and the layout ends up dictated by what’s in the box instead of what the property actually needs.
Flip that order. Sketch tonight, run the numbers through an estimator, and get a local project report before you spend a dollar on hardware. Start with safety zones and a small, deliberate set of focal points. Everything else can grow from there.
— Christian
Get a Contractor-Ready Lighting Plan Without the Guesswork
Property Improvement Estimator is the alternative to hiring a designer just to get a workable plan: you draw the zones and fixtures yourself, on your own aerial map, and walk away with a cost range and parts list built around your actual property instead of a generic national average.

Run your yard through the Outdoor Lighting Estimator and you get a scaled fixture layout, transformer sizing, and a material and labor cost range in one pass, no account required. Pair it with the material cost calculator to break out fixture and wire costs separately, or send your finished map straight into a local project report so contractors are quoting against the exact same plan you designed. If you’re weighing lighting against other outdoor work this season, the same mapping approach works for a deck estimate or a pool estimate on the same property map. Start your lighting layout now and see your cost range before you call a single contractor.
Where to Read More
For deeper technical grounding, the U.S. Department of Energy’s outdoor area lighting report covers LED photometry and specification standards. ESFI publishes outdoor electrical safety guidance every homeowner running wire outside should read. Energy explains why LED efficacy and lifespan now beat older HID and incandescent options for most residential fixtures.
Sources
- Landscape lighting design: how to plan your outdoor space (Hammerton)
- Design and specification considerations for outdoor area lighting (U.S. DOE / technical report)
- Outdoor electrical safety resources (ESFI)
- How to plan landscape lighting before plants and hardscape (iScape)
FAQ
How Do You Lay Out Landscape Lighting?
Start by dividing the yard into zones (entry, pathway, entertaining, accent, and perimeter), sketch them to scale with existing power sources marked, then choose fixtures for each zone based on its role. Wire each zone so it can run independently, size the transformer at 80% of its rated capacity, and finalize fixture aim after dark over a couple of test evenings.
What Spacing Should You Use for Path Lights?
Space path lights so their light pools just overlap rather than lining up in a tight row, which for most fixtures lands around 8 to 10 feet apart depending on beam spread. Alternating fixtures from one side of the path to the other, instead of matching them evenly on both sides, generally looks more natural and uses fewer fixtures overall.
What’s the General Rule of Thumb for Outdoor Lighting?
The rule most designers work from is layering three light types, ambient, accent, and task, into distinct zones with independent control, rather than lighting the whole yard evenly. Limit yourself to one to three focal points so the layout has contrast instead of looking flat, and always size the transformer with margin below its rated capacity.
What Are Current Trends in Landscape Lighting?
Warm white LED fixtures in the 2,700K to 3,000K range remain the standard for residential layouts because they read as natural and inviting rather than clinical. Smart zone controls that let homeowners schedule or dim each zone independently, and moonlighting effects that mimic natural light through tree canopies, are both showing up more often in current designs.
Does Property Improvement Estimator Show Lighting Layout Costs?
Yes. The Lighting Estimator lets you draw your planned fixture layout on an aerial map of your property and returns a material and labor cost range along with transformer sizing, with no account required to get started.