Turn Driveway Apron Design into a Site Estimate for a Durable Apron
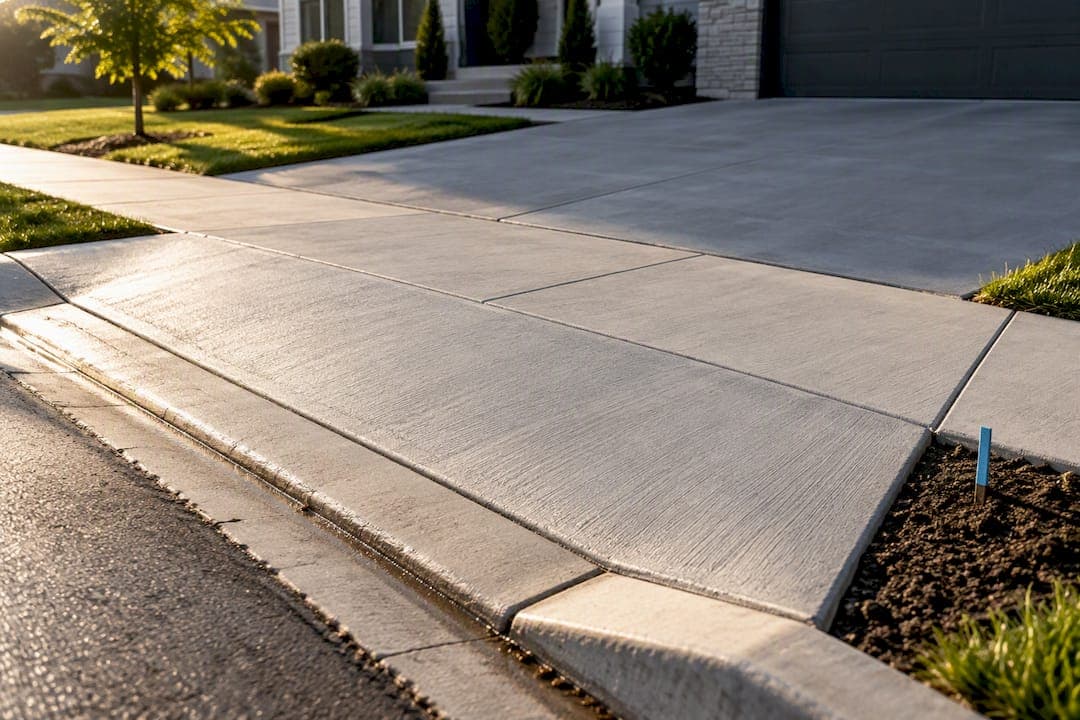
The best driveway apron design starts underground, not on the surface. Pick a finish that matches your driveway or home style, but the material choice matters far less than what happens beneath it: proper subgrade compaction, drainage, and slab thickness are what keep an apron from cracking within a few winters. Before you pour anything, check your local permit rules, then map the project and run cost numbers so you know what you’re actually working with.
TL;DR:
- Proper subgrade compaction, adequate drainage, and sufficient slab thickness are crucial for apron longevity, regardless of surface finish or material choice.
- Concrete remains the most versatile and permitted material, but pavers, natural stone, and permeable options are viable depending on local climate and stormwater management needs.
- Excavation, base preparation, and correct grading are the main factors preventing cracking, shifting, and drainage issues that cause apron failure.
- Apron width typically matches or slightly exceeds the driveway, with minimums around 10 feet and maximums near 20 feet based on local regulations.
- Focusing on the foundation during construction and conducting site-specific estimates helps avoid costly rework and ensures durability over the long term.
Table of Contents
- What Is a Driveway Apron, and What Makes a Design Work?
- Which Materials Work Best for Driveway Aprons?
- How Do You Build a Driveway Apron Step by Step?
- How Wide and Thick Should a Driveway Apron Be?
- What Does a Driveway Apron Cost?
- How Mapping Tools Turn Design Ideas Into a Real Budget
- Maintaining Your Apron by Material Type
- Common Apron Problems and How to Fix Them
- Blending the Apron With Your Sidewalk and Driveway
- Sustainable Driveway Apron Design Options
- Winter Weather and Apron Durability
- Author’s Take: Prioritize the Base, Then Have Fun With the Finish
- Get a Site-Specific Apron Estimate Before You Call Contractors
- Sources
- FAQ
What Is a Driveway Apron, and What Makes a Design Work?
A driveway apron is the transition slab connecting your driveway to the street or sidewalk, and it takes more abuse than any other section of pavement on your property. It absorbs turning traffic, drainage runoff, and the weight of every vehicle that pulls in or out, which is why design experts flag it as the most-abused section of a driveway. A strong driveway apron design blends visual continuity with your home’s style and structural choices that hold up under repeated stress. Get the base and drainage right first. The surface finish is where you get to have fun.
Border and accent treatments
Belgian block edging, paver bands, and contrasting color strips are the easiest ways to dress up an otherwise plain slab without touching the structural budget. A charcoal paver border against a warm buff concrete field reads as intentional, not accidental.
Surface patterns worth considering
- Stamped concrete mimicking cobblestone or slate gives an upscale look at a fraction of natural stone’s cost.
- Exposed aggregate adds texture and slip resistance, which helps in rain or snow.
- Herringbone-laid pavers create visual movement and are easier to patch section by section later.
- Contrasting color bands at the apron’s edges visually separate it from the driveway while keeping a unified palette.
Matching your apron finish to the driveway is the safer, lower-maintenance route. Intentional contrast, like a paver apron against a plain concrete driveway, works well when the rest of your landscaping already leans toward a more layered, custom look.
Which Materials Work Best for Driveway Aprons?
Among the best materials for driveway aprons, concrete remains the default for a reason: it’s durable, relatively affordable, and widely permitted. But it’s not the only option, and the right choice depends on your climate, budget, and how much upkeep you want to commit to.
- Concrete: Reinforced with rebar or wire mesh, finished broom, stamped, or exposed aggregate. It’s accepted by nearly every municipality, and holds up well when the mix and thickness are specified correctly.
- Pavers: Individual units mean easier spot repairs if one cracks or settles, plus more design flexibility, but they demand a properly compacted base or they shift.
- Natural stone: The highest-end look and the highest price tag, requiring specialized installers who know how to set stone over a stable base.
- Asphalt: A lower upfront cost option, generally best where the street itself is asphalt and there’s no raised curb to tie into.
- Permeable pavers or porous concrete: Increasingly favored by cities managing stormwater runoff, especially where impervious surface limits apply.
Pro Tip: Call your city’s public works department before you commit to a material. Some municipalities restrict apron materials based on the adjacent curb type, and permeable systems sometimes qualify for reduced stormwater fees.
How Do You Build a Driveway Apron Step by Step?
Most failed aprons don’t fail because of the surface. They fail because of what’s underneath it, according to contractor guidance on concrete apron installation. A thin slab poured over uncompacted soil will crack regardless of how nice the stamped pattern looks.
- Check permits, curb cuts, and utilities before any digging starts. Skipping this step is the single most common source of costly rework.
- Measure, mark, and cut the removal area, then demo the old slab if one exists.
- Excavate to a stable subgrade, removing soft or organic soil that won’t compact reliably.
- Install and compact a gravel base, typically 4 to 6 inches of crushed aggregate, tamped in layers rather than dumped and compacted once.
- Set forms and reinforcement, then place concrete, lay pavers, or pour asphalt depending on your material choice.
- Finish the surface and cut control joints while concrete is still workable, spacing them according to slab thickness.
- Cure or settle before allowing traffic. Concrete generally needs a week before light vehicle use and closer to a month for full strength.
A step-by-step paver-mat installation from This Old House shows this can be a weekend DIY project when the demo and base prep are modest. Heavy excavation, drainage correction, or grading problems are where hiring a pro pays for itself.
Statistic Callout: Best-practice guidance recommends a minimum 6-inch slab for aprons in most jurisdictions, thicker than the 4-inch standard often used for regular driveway pavement, because aprons absorb turning loads and heavier traffic stress.
How Wide and Thick Should a Driveway Apron Be?
Driveway apron width should generally match or slightly exceed your driveway’s width where it meets the street, though cities often set their own minimums and maximums. Some jurisdictions require a minimum width around 10 feet and cap it near 20 feet, with material rules tied to the adjacent curb, according to Rockville, Maryland’s residential driveway apron standards.
- Thickness: A minimum thickness is commonly recommended for concrete aprons carrying vehicle turning loads, per Creststone Concrete’s guide to driveway apron construction.
- Reinforcement: Air-entrained concrete mixes around 4,000 PSI hold up better against freeze-thaw cycling than standard mixes.
- Joint spacing: Michigan Concrete’s design guidelines recommend control joint intervals related to slab thickness to help prevent random cracking.
- Slope: A gentle grade away from the garage and toward the street keeps water moving, and where a sidewalk crosses the apron, cross-slope transitions need careful grading to stay within ADA accessibility limits without trapping water.
- Permits: Confirm right-of-way rules, curb-cut approval, and inspection requirements with your local public works or transportation department, since access management standards focus on sight distance, drainage, and pedestrian safety.
What Does a Driveway Apron Cost?
For a typical 10 by 8 foot concrete apron, expect a modest project price that climbs quickly once demo, base repair, or curb-cut work enters the picture. A 20 by 8 foot apron scales the cost proportionally, though wider aprons often need more reinforcement.
- Demo and removal of the old slab is often the first line item, and it grows if the old base is deeper or reinforced with old rebar.
- Base repair drives cost more than surface material choice does, especially if soil is soft or poorly draining.
- Permit fees vary by city and can include separate charges for right-of-way work versus standard building permits.
- Material choice shifts the budget: asphalt tends to run cheaper upfront, natural stone runs highest, and concrete or pavers land in between.
Replacing just the apron, rather than the whole driveway, is often the most economical fix when the rest of the driveway is still sound.
Pro Tip: Always add a contingency, at least 10 to 15%, for unexpected base repair. It’s the most common reason apron budgets run over.
How Mapping Tools Turn Design Ideas Into a Real Budget
Sketching an apron on paper only gets you so far. Drawing it on aerial imagery of your actual property captures the real dimensions, the curb relationship, and the surrounding driveway footprint, which is where a lot of ballpark estimates go wrong.
Running a concrete estimator or asphalt estimator against those exact measurements gives you a site-adjusted price range instead of a generic square-footage guess. That number reflects your local material costs and your project’s real scope, not a national average.
The output becomes a project packet: measurements, material choices, and reference photos that a contractor can quote against directly. Fewer back-and-forth questions during bidding usually means fewer surprises once the crew shows up.

Maintaining Your Apron by Material Type
Concrete aprons need the least routine attention but benefit from resealing every two to three years, especially in freeze-thaw climates where water intrusion into hairline cracks causes bigger problems over winter. Sweep salt residue off promptly since deicing chemicals accelerate surface scaling on unsealed concrete.
Pavers need periodic joint sand replenishment, usually every couple of years, because wind and rain slowly wash it out and let individual units shift. A polymeric sand product locks joints in place longer than standard sand and resists weed growth between units.
Natural stone requires the most careful maintenance: periodic sealing to prevent staining, and mortar joint inspection if it was set in a mortared bed rather than a sand base. Oil and rust stains penetrate porous stone faster than they do dense concrete, so quick cleanup matters more here.
Asphalt aprons need sealcoating roughly every two to three years to slow oxidation and keep the surface from becoming brittle. Small cracks should get filled as soon as they appear, because water intrusion is what turns a hairline crack into a pothole by the next thaw cycle.
Across every material, the same principle holds: water is the enemy, and staying ahead of small cracks or joint gaps costs far less than fixing what they turn into.
Common Apron Problems and How to Fix Them
Cracking is the complaint homeowners raise most, and it’s almost always a base problem, not a material defect. Weak or uncompacted subgrade lets the slab flex under vehicle weight, and concrete has no give, so it cracks. The fix, once it’s already happened, is usually replacement rather than patching, because a patched crack over a soft base will just crack again nearby.
Drainage issues show up as pooling water at the apron’s low point or water sheeting back toward the garage instead of toward the street. This traces back to grading mistakes made during installation. Regrading a small section is sometimes possible, but severe pooling usually means the apron needs to come out and get reset with correct slope.

Shifting or settling pavers point to inadequate base compaction or joint sand that’s washed out over time. Lifting the affected pavers, adding and recompacting base material, then resetting with fresh joint sand solves most cases without a full teardown.
Heaving, where sections of the apron rise unevenly, typically happens in freeze-thaw regions when water gets trapped under the slab and expands as it freezes. Proper base drainage and a slight slope away from the structure during original construction prevent this almost entirely, which is another reason most apron failures trace back to poor preparation rather than the surface material chosen.
Blending the Apron With Your Sidewalk and Driveway
A driveway apron sits at the intersection of three different surfaces: the street, the sidewalk, and your driveway. Getting that intersection right means thinking about both how it looks and how water and foot traffic move through it.
Visually, the strongest results happen when the apron either matches the driveway finish closely or contrasts with it in a way that reads as deliberate, like a lighter concrete apron framing a darker paver driveway. Matching the sidewalk finish isn’t necessary and often isn’t required, but keeping a consistent color family across all three surfaces avoids a patchwork look.
Functionally, the sidewalk crossing is where accessibility and drainage can pull in opposite directions. Sidewalks need to stay reasonably flat for wheelchair and stroller access, while the apron needs enough slope to shed water toward the street. The solution is a carefully graded transition zone or an engineered ramp detail that satisfies both needs rather than sacrificing one for the other. Contractors familiar with municipal sidewalk standards can usually calculate this transition correctly the first time, which is one more reason this particular detail is worth professional input even on an otherwise DIY-friendly project.
Sustainable Driveway Apron Design Options
Permeable pavers and porous concrete are gaining ground in city permit offices, particularly in areas managing stormwater runoff more aggressively. These surfaces let water pass through into the base layer instead of sheeting off into storm drains, reducing runoff volume during heavy rain.

Some municipalities offer reduced stormwater fees or expedited permit review for permeable installations, since they directly reduce the burden on public drainage infrastructure. Recycled aggregate base material is another lower-impact choice, using crushed concrete or asphalt instead of virgin quarried stone, and it performs comparably in most compaction applications.
Light-colored concrete or lighter paver finishes also reduce the heat island effect compared to dark asphalt, which matters more in hotter climates where surface temperature affects nearby landscaping and even indoor cooling loads. None of these choices require sacrificing durability. A well-compacted permeable paver base performs just as reliably as a standard base, provided installation follows the same compaction standards.
Winter Weather and Apron Durability
Freeze-thaw cycling is the single biggest long-term threat to any driveway apron, regardless of material. Water that seeps into hairline cracks or porous surfaces expands when it freezes, widening the crack a little more each cycle until a minor cosmetic issue becomes a structural one.
Air-entrained concrete mixes are specifically designed to resist this, using microscopic air bubbles that give trapped water room to expand without cracking the surrounding material. This is why durable cold-climate aprons typically specify air-entrained mixes rated for freeze-thaw exposure rather than a standard mix.
Deicing salt accelerates surface scaling on unsealed concrete, so a fresh sealant coat before winter is one of the cheapest insurance policies available. Pavers handle freeze-thaw reasonably well because individual units can shift slightly without the whole surface cracking, though joint sand loss accelerates in climates with frequent freeze-thaw cycles. Asphalt softens in summer heat and becomes brittle in extreme cold, so sealcoating timing matters more in climates with wide seasonal temperature swings.
Author’s Take: Prioritize the Base, Then Have Fun With the Finish
If your budget forces a choice, spend it on the base and drainage, not the surface finish. A plain broom-finished slab on a properly compacted base will outlast a stamped, colored apron poured over weak subgrade. Upgrade the look later. Fix the foundation now, then map your project and generate an estimate before calling contractors.
— Christian
Get a Site-Specific Apron Estimate Before You Call Contractors
Generic per-square-foot quotes rarely reflect what your driveway apron actually needs, especially once base repair, curb-cut work, or drainage corrections enter the picture. Propertyimprovementestimator lets you draw your apron directly onto a satellite view of your own property, capturing real dimensions and its relationship to the curb and driveway instead of guessing.

From there, run the Concrete Estimator or Asphalt Estimator to get a price range adjusted for your local material and labor costs. The tool builds a project packet with your measurements, material choices, and photos, which cuts down the back-and-forth that usually slows down contractor bidding. When you’re ready, generate a local project report or request matched leads so contractors quote against the same scope instead of guessing at yours.
Sources
Check U.S. DOT access management guidance for permit context, review ConcreteNetwork’s apron overview for structural best practices, and consult your local public works office before altering a right-of-way. For DIY limits on structural exterior work, One Day Doors & Closets covers similar pitfalls worth reading before deciding what to tackle yourself.
- ConcreteNetwork — Driveway aprons
- This Old House — How To Build a Driveway Apron
- U.S. DOT — Access management and driveways
- Creststone Concrete — What is a concrete driveway apron? (2026)
FAQ
What Is the Best Material for a Driveway Apron?
Concrete is the most widely used and permitted choice because it balances durability, cost, and design flexibility. Pavers offer easier spot repairs, natural stone gives the highest-end look at a premium price, and asphalt works best where the street itself is asphalt with no raised curb.
How Wide Should a Driveway Apron Be?
Apron width should generally match or slightly exceed the driveway’s width where it meets the street. Some cities set minimums near 10 feet and maximums around 20 feet, so check with your local public works department before finalizing dimensions.
What Is the Average Cost of a Driveway Apron?
Cost depends heavily on demo, base repair, and material choice, with asphalt typically running lower upfront than concrete or natural stone. Getting an exact number requires a site-specific estimate since base condition and permit fees vary by location; you can run one through Propertyimprovementestimator’s concrete estimator using your property’s actual dimensions.
How Can I Make a DIY Driveway Apron?
A paver-mat apron installation can work as a weekend DIY project when the demo and base prep are modest, following a sequence of measuring, removing the old slab, compacting a base, and setting the mats. Heavier excavation, drainage correction, or significant grading problems are situations where hiring a professional saves both time and rework costs.
Recommended
- Asphalt Cost Calculator | Estimate Driveways, Overlays, Sealcoating, and Local Costs
- Asphalt Estimate Calculator | Driveways, Overlays, Sealcoating, and Local Factors
- Concrete Estimate Calculator | Slabs, Driveways, Thickness, and Local Factors
- Concrete Cost Calculator | Estimate Slabs, Driveways, Thickness, and Local Costs