Five Deck Layout Ideas That Actually Work (And How to Test One)

Most decks fall into one of five layouts: single-level open plans, multi-level zoned decks, wraparound/attached decks, compact floating decks, and poolside decks. Single-level works best when you want easy furniture arrangement. Multi-level suits sloped yards or households juggling separate activities. Wraparound decks maximize flow around a home’s shape. Compact floating decks solve tight-yard problems. Poolside decks prioritize water access and slip resistance.
Your next move isn’t picking paint colors or railing styles. It’s naming your activity zones (dining, cooking, lounging, walking through) and testing the layout on-site with stakes and string, or modeling it in a deck design tool, before you buy a single board.
- Single-level open plan: best for flexible furniture and easy construction
- Multi-level zoned deck: best for slopes and separating loud/quiet activities
- Wraparound or attached deck: best for homes needing flow around multiple entry points
- Compact/floating deck: best for small lots or renters
- Poolside deck: best for water access and slip-resistant zones
TL;DR:
- Proper zone planning and on-site testing are crucial before purchasing materials, focusing on activity flow rather than aesthetic choices alone.
- Multi-level decks work best on sloped lots or when distinct activities like dining and lounging need separation to prevent noise and smoke interference.
- Using stakes and string with the 3-4-5 method ensures accurate layout dimensions and avoids costly scale or planning errors.
- Local building codes for guardrails, ledger flashing, and joist spacing must be confirmed before finalizing and ordering materials to prevent structural issues.
- Drawing the deck on a satellite map with property-specific estimators provides precise cost predictions and improves bid accuracy for contractors.
Table of Contents
- Deck Layout Ideas by Activity and Style
- How Do You Plan Deck Zones and Traffic Flow?
- When Should You Build a Multi-Level Deck?
- Deck Plank Patterns and Layout Tricks
- What Sizing, Permit, and Structural Details Matter Before You Build?
- Common Deck Layout Mistakes to Avoid
- Tools That Turn a Layout Idea Into a Buildable Plan
- Planning Deck Layout Around Drainage and Cleaning Access
- Weather Protection and Layout: Awnings, Pergolas, and Shade
- How Material Choices Shape Your Deck Layout Options
- Key Takeaways
- Sources
Deck Layout Ideas by Activity and Style
The best deck layouts start with function, not aesthetics. Pick your dominant use case first, then let the shape follow.
- Dining-focused layout. Center the table where it gets a minimum clearance on all sides sufficient for chairs to pull out comfortably. Keep a serving path from the kitchen door to the table clear of furniture, and add a light fixture directly above.
- Lounge and outdoor living zone. Arrange seating around a fixed focal point, a fireplace, television, or simply a view, and anchor the grouping with an outdoor rug or a partial pergola overhead so it reads as its own room.
- Outdoor kitchen and grilling zone. Leave at least 3 feet of clearance behind the grill for the cook to move freely, and orient the setup so smoke drifts away from seating rather than across it.
- Fire pit or conversation pit. Arrange seating in a rough circle or arc around the fire, and keep combustible furniture and railings at a safe radius, typically several feet beyond the pit’s edge depending on the manufacturer’s specs.
- Poolside and transitional decking. Choose slip-resistant boards near water and route a direct, obstacle-free path from the main deck to the pool entry so wet feet aren’t crossing dining or lounge zones.
Professional designers plan activity zones like these before locking in a deck’s shape, precisely because circulation problems are much harder to fix after the joists are down.
How Do You Plan Deck Zones and Traffic Flow?
Good deck layout planning is really just traffic engineering at a small scale. Here’s the order that works:
- Rank your activities. List everything you want on the deck, then split it into “must-have” (dining table, grill) and “nice-to-have” (fire pit, daybed). Space is always tighter than the wish list.
- Measure furniture footprints. Add 36 to 48 inches of clearance around seating groups and 30 to 36 inches for any path people will walk through regularly, not just occasionally.
- Mock up the perimeter with stakes and string. Square the corners using the 3-4-5 method, measuring 3 feet along one line, 4 feet along the perpendicular line, and confirming the diagonal reads 5 feet. A quick string mockup catches scale issues a floor plan never shows you.
- Place stairs where people actually walk. Match stair location to the natural path toward the yard, garden, or driveway rather than wherever framing is simplest.
Pro Tip: Walk the string-and-stake mockup at different times of day. A layout that looks great at noon can put your dining table in blazing afternoon sun or your lounge chairs in evening shadow you didn’t plan for.
When Should You Build a Multi-Level Deck?
Multi-level layouts earn their extra framing cost when a single plane can’t cleanly separate your activities. A raised dining tier next to a lower lounge area, or a grilling platform tucked below a quieter seating deck, keeps smoke, noise, and foot traffic from colliding.
- Sloped lots often favor tiered decks because stepping down with the grade reduces the amount of excavation and fill needed, as long as each level keeps uniform step heights and its own drainage plan.
- Small decks don’t need levels to feel bigger: built-in benches double as storage, foldable furniture clears floor space when not in use, and a vertical screen or planter wall adds privacy without eating into square footage.
- Landings and short stair runs, even just two or three steps, give your eye a place to pause between zones, which reads as intentional design rather than cramped improvisation.
Deck Plank Patterns and Layout Tricks
Board direction changes how a deck feels before you add a single piece of furniture.
- Picture-frame borders run a contrasting or perpendicular board around the perimeter, hiding cut ends and giving the whole deck a finished edge.
- Diagonal or herringbone patterns visually stretch a small or narrow deck, though they also mean more cuts and more waste.
- Parting boards insert a narrow strip partway across the deck, letting you use shorter boards on each side while creating a clean visual break. Picture-frame borders and parting boards also simplify material planning by avoiding awkward end cuts.
- Any pattern beyond straight boards usually requires extra blocking or a change in joist direction, so confirm the framing plan with your deck design tool or contractor before you commit to a diagonal layout.
- Contrasting board colors along a walking path or stair edge double as a visual guide, subtly steering guests where you want them to go.
What Sizing, Permit, and Structural Details Matter Before You Build?
A layout only works if it’s buildable at the size you drew it. A few numbers to check before finalizing anything:
- Allow full chair pull-out room at dining tables (36 to 48 inches), 30 to 36 inches for walkways, and 3 feet of service space behind a built-in grill.
- Footprint, decking material (composite versus wood), railing style, stairs, and any built-in bench or planter are the biggest cost drivers, in roughly that order.
- Decks elevated enough above grade generally require guardrails, though exact rules vary by jurisdiction and you should confirm with your local building authority before finalizing your design.
- Ledger flashing and joist spacing aren’t glamorous details, but they’re the two most common points of structural failure on decks that skip inspection.
Run a site-specific deck estimate once your layout is roughed in, and ask your local permit office about review timelines before you order materials, some jurisdictions take weeks, not days.
Common Deck Layout Mistakes to Avoid
Most deck regrets trace back to a handful of avoidable errors:
- Skipping the permit check because the deck “seems small enough” to fly under the radar.
- Improper ledger flashing, which lets water into the house rim joist and rots framing from the inside out.
- Joist spacing that’s too wide for the decking material, causing boards to bounce or sag over time.
- Furniture or planters placed directly in a natural walking path, forcing guests to awkwardly route around them.
Common mistakes like skipping code checks and misjudging joist spacing are the two structural issues that come up again and again in inspection reports.
Pro Tip: Before ordering materials, walk your string mockup one more time and place your actual outdoor furniture (or cardboard stand ins) on the ground where it will go. If two pieces overlap or block a doorway, fix it now.
Tools That Turn a Layout Idea Into a Buildable Plan
A sketch on paper is a starting point, not a plan. Deck design software can generate 3D views, framing layouts, material and cut lists, and permit-ready construction documents, all from the same drawing you’d otherwise hand a contractor as a rough idea.
The workflow that gets you from idea to permit usually runs: pick a layout concept, model it in a deck planner, export the material and cut list, cross-check local code items like railing height and joist spacing, then hand the package to your contractor.
- Precise footprint drawn against your actual property lines, not a guess
- Site-specific cost estimate tied to local material and labor rates
- A contractor-ready packet with dimensions and photos attached
A satellite-based estimator that hands contractors a drawn plan with real dimensions reduces bid variance because every bidder is pricing the same scope instead of guessing at it.
Propertyimprovementestimator’s satellite drawing tool works from your actual property map, so the deck footprint you plan lines up with the yard you have. Accept a tool’s output for material counts and rough cost. For anything involving a fire pit, hot tub, or heavy concentrated load, get a structural engineer to review post and ledger sizing before you build.
Planning Deck Layout Around Drainage and Cleaning Access
A gorgeous layout that traps water or blocks access for cleaning turns into a maintenance headache within a year or two. Layout decisions made at the planning stage determine how easy your deck is to keep up for the next decade.
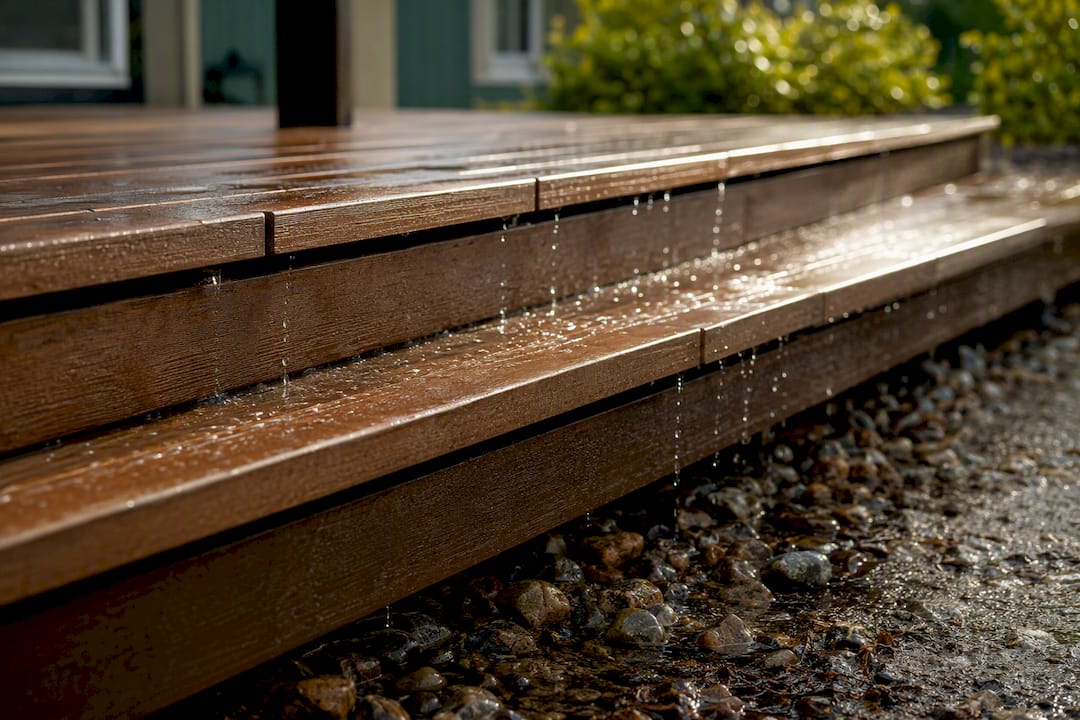
Multi-level decks need drainage planned between tiers, not as an afterthought once the framing’s done. Water running off an upper level has to go somewhere, and if that somewhere is the ledger board or a lower-level walking surface, you’re looking at rot or a slippery hazard. Space boards with consistent gapping so water sheds through rather than pooling on top, and if you’re building over a living space below, plan for an under-deck drainage system before the joists go in.
Cleaning access matters just as much as drainage. Built-in benches, planters, and skirting all look great until you need to get underneath them to clear leaves or check for rot. Leave at least one removable panel or gap near low points on the deck so you (or a contractor) can inspect and clean without tearing anything apart. Fire pits and outdoor kitchens generate grease and ash that need a clear, hose-friendly surface nearby, not a tight corner surrounded by furniture.
If your layout includes a pool transition zone, keep that path unobstructed for the seasonal task of vacuuming filters, adjusting covers, and rinsing chemical residue off the decking, jobs that get skipped when they require moving furniture first.
Weather Protection and Layout: Awnings, Pergolas, and Shade
Shade and rain protection change how a deck functions across the seasons, and where you plan them shapes the rest of your layout.
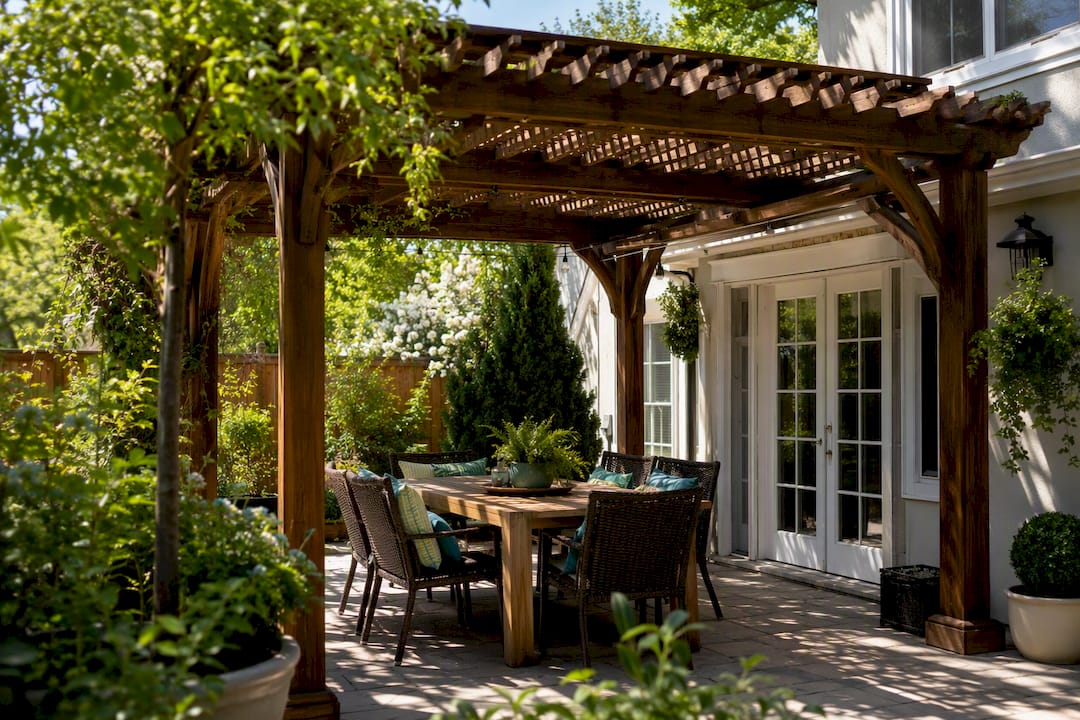
A pergola works best over a fixed lounge or dining zone since its posts become a permanent part of the layout; plan for those footings before you finalize furniture placement, not after. Retractable awnings offer more flexibility since they mount to the house and can extend or retract based on sun angle, but they only shade the area directly beneath them, so measure your dining or lounge footprint against the awning’s actual reach before assuming full coverage.
Freestanding shade sails and umbrellas are the easiest to retrofit into an existing layout because they don’t require structural footings, though they also do less to block wind or rain than a fixed structure.
Whichever option you choose, keep sightlines and circulation in mind. A pergola with closely spaced posts can accidentally choke off the walking path you spent time laying out with stakes and string. If you’re integrating a shade structure with outdoor lighting, an outdoor lighting estimate can help you plan fixture placement around the posts and rafters before wiring goes in, since retrofitting electrical after a pergola is built costs more than planning it in from the start.
How Material Choices Shape Your Deck Layout Options
The decking material you choose doesn’t just affect cost and maintenance, it constrains or opens up specific layout ideas.
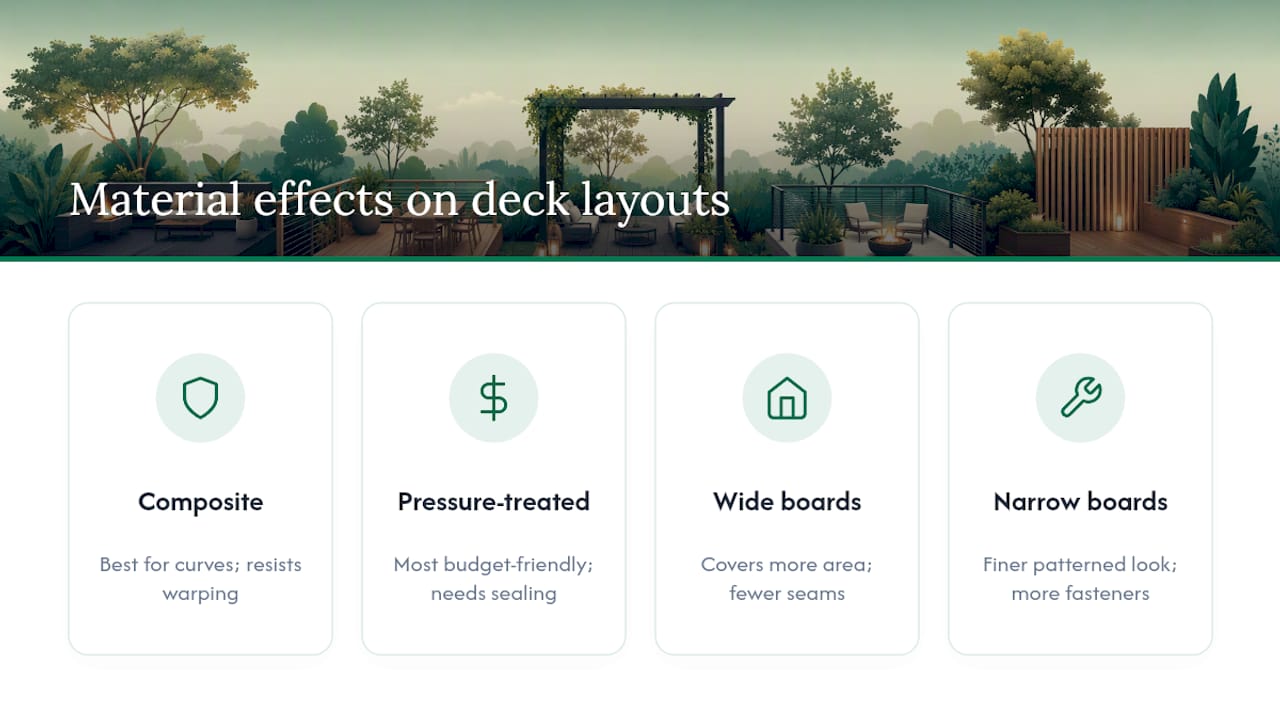
Composite decking holds up better than wood for continuous curves or tight radial patterns around a fire pit, since it doesn’t warp the way lumber can over a few seasons of exposure. That makes it a better fit for conversation-pit layouts or anything with an unusual shape. Pressure-treated wood remains the most budget-friendly option and works fine for straight-line layouts, but it demands more frequent sealing and inspection, especially in patterned layouts where end grain gets exposed at cuts.
Board width also matters more than most people expect. Wider boards (5.5 inches versus the standard 3.5 to 5 inches) cover more area with fewer seams, which suits simple single-level layouts but can make diagonal or herringbone patterns look clunky since the pattern repeats less often across the same footprint. Narrower boards give patterned layouts a finer, more deliberate look at the cost of more fasteners and cut ends to manage.
Railing material interacts with layout too. Glass or cable railings preserve sightlines on decks with a view, which matters if your layout puts a lounge or dining zone at the edge overlooking a yard or pool. Solid wood or composite railings block more wind, useful on an elevated multi-level deck where the upper tier catches more breeze than the ground-level zone below it. Whatever combination you land on, running a material cost comparison before finalizing your pattern keeps the design and the budget aligned from the start.
A Planning Priority Worth Repeating
If there’s one thing worth internalizing here: zone-first planning beats chasing whatever layout is trending. Sketch your idea, then test it with strings or a design tool before you buy a single board.
— Christian
Draw Your Deck, Get a Site-Specific Estimate
Propertyimprovementestimator is the alternative to guessing at deck costs from a generic online calculator: draw your actual layout on a satellite view of your property, and get an estimate built around your real dimensions and local pricing, not a national average.

That precision pays off twice. First, you know your rough budget before you ever call a contractor. Second, every contractor you contact receives the same drawn plan with dimensions and photos attached, so the bids you get back are quoting the same scope instead of guessing at different versions of your project. Ready to see what your layout actually costs? Head to the deck estimator and start drawing your zones on the map.
Key Takeaways
Zone-first planning, tested on-site with stakes and string or in a 3D design tool, is what separates a deck that works from one that gets rebuilt in five years.
| Point | Details |
|---|---|
| Pick your layout family first | Choose between single-level, multi-level, wraparound, compact, or poolside based on your yard and activities. |
| Zone before you shape | Rank dining, lounging, cooking, and circulation needs before deciding the deck’s final footprint. |
| Test with strings, not guesses | Use stakes, string, and the 3-4-5 method to square corners and catch scale problems before building. |
| Check codes before ordering materials | Confirm guardrail height, ledger flashing, and joist spacing with your local building authority. |
| Use Propertyimprovementestimator for a site-specific number | Draw your layout on a satellite map to get a tailored estimate and a contractor-ready packet in one step. |
Sources
- How to plan your deck layout — Houzz
- How to design a deck: Tips for planning deck layouts and frames — Lowe’s
- Decks