Homeowners: Make Dark Sky Outdoor Lighting Work With a Site Plan
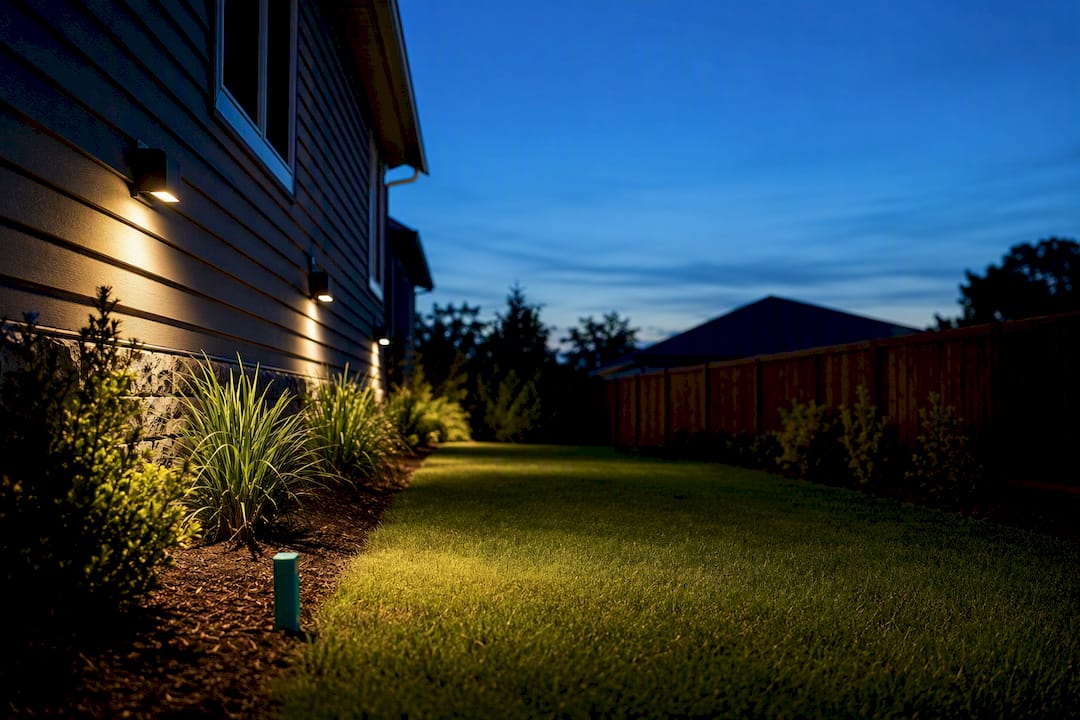
Dark sky outdoor lighting means light aimed only where you need it, at the lowest output that still does the job, controlled by timers or sensors, and cast in a warm color. The immediate fix for most yards is simple: swap unshielded fixtures for fully shielded ones, cut lumen output, and add a timer, photocell, or motion sensor. Follow DarkSky Approved criteria and the IES Five Principles, and you solve most of the problem before you even think about bulb color.
TL;DR:
- Proper installation and aiming are more critical than bulb color or lumen output in reducing sky glow and light trespass.
- Certification like DarkSky Approved guarantees fixture design standards but does not account for installation and aiming practices.
- Fixtures should have full cutoff shielding, matched lumens to the task, and be controlled with timers or sensors to comply with responsible outdoor lighting principles.
- Reflective surfaces and incorrect aiming can cause significant glare and trespass, even with compliant fixtures, emphasizing the importance of post-installation inspection.
- Regular maintenance, rechecking aim and sensor settings seasonally, is necessary to maintain dark sky compliance over time.
Table of Contents
- What “Dark Sky” Outdoor Lighting Means and the Five Principles
- What DarkSky Approved and IES Guidance Actually Guarantee
- Fixture and Installation Checklist for Homeowners
- Controls and Scheduling That Actually Cut Light Pollution
- Why Kelvin Rating Alone Won’t Fix Your Lighting
- Common Homeowner Mistakes and How to Field-Check Your Install
- Comparing Common Outdoor Light Types by Their Sky Impact
- How to Choose Certified Fixtures Across Different Manufacturers
- Keeping Your Lighting Dark Sky Compliant Year After Year
- Balancing Night-Sky Protection With Safety and Curb Appeal
- Plan Your Dark-Sky Lighting Project Before You Buy a Single Fixture
- Sources
- FAQ
What “Dark Sky” Outdoor Lighting Means and the Five Principles
Light pollution shows up in three forms: sky glow (the orange haze over towns), glare (light bright enough to hurt your eyes), and light trespass (light spilling onto a neighbor’s property or into their windows). The National Park Service defines these categories and recommends checking for all three from your own property line before calling a lighting job finished.
DarkSky International and the Illuminating Engineering Society built Five Principles for Responsible Outdoor Lighting around one question: does this light serve an actual task? If not, cut it.
- Useful. Every fixture should serve a specific purpose, not just fill space.
- Targeted. Light the ground or object that needs it, not the sky or the street.
- Low level. Use the minimum output that still lets you see clearly.
- Controlled. Run lights only when needed, using timers or sensors.
- Warm-colored. Choose warmer light sources over cool blue-white ones.
Designing around the task first is the whole trick. A porch light meant for finding your keys doesn’t need the same lumens as a floodlight meant to deter someone walking across your backyard, yet homeowners routinely install the same fixture for both.
What DarkSky Approved and IES Guidance Actually Guarantee
A DarkSky Approved label tells you a fixture met specific engineering thresholds, not that it will automatically fix your yard. The DarkSky Approved luminaires program requires manufacturers to hit measurable targets before they can use the label:
- Zero uplight above 90 degrees, meaning no light escapes upward into the sky.
- A capped lumen output appropriate to the fixture’s intended use.
- Dimmability, so output can be reduced during low-activity hours.
- Wildlife-tuned spectral limits for fixtures marketed near sensitive habitats.
The IES approaches the same problem from a different angle, publishing recommended practices that balance safety, ecology, and night-sky protection for residential exterior lighting. Its guidance functions less like a badge and more like a specification sheet, useful when you’re writing out exactly what you want a contractor to install.
Here’s the catch nobody puts on the packaging: certification covers the fixture, not the installation. A DarkSky Approved floodlight aimed at a 45-degree angle instead of straight down will still throw glare and trespass light onto your neighbor’s fence. The label is one input. Aiming, mounting height, and controls decide what actually happens once the fixture goes into the ground.
Fixture and Installation Checklist for Homeowners
Before you buy anything, write down what each fixture needs to do and where. Then check it against these specs.
- Require full cutoff shielding. The fixture housing should block any direct view of the bulb from above or from the side, sending light straight down.
- Match lumens to the task. A walkway needs far fewer lumens than a driveway entrance; oversizing output is the single most common overspend homeowners make.
- Confirm dimmability. A fixture that can step down output late at night saves energy and cuts sky glow without sacrificing early-evening visibility.
- Check the wet-location rating. Anything exposed to rain, sprinklers, or snowmelt needs a rating that matches its actual exposure, not just its price point.
- Set mounting height and angle before installation. Lower, downward-aimed fixtures almost always outperform tall poles pointed at an angle, since taller poles throw light further off the property.
When a supplier hands you a spec sheet, ask for the photometric distribution and BUG rating (Backlight, Uplight, Glare). A low uplight number matters more than almost anything else on that sheet.
Pro Tip: Ask your contractor to show you the fixture’s photometric diagram before installation, not after. It takes five minutes and prevents a return trip to re-aim a floodlight that’s already bolted to your siding.
Controls and Scheduling That Actually Cut Light Pollution
Sensors and schedules do more for your energy bill and your neighbors’ sleep than any single fixture upgrade. Pair a timer or photocell for predictable dusk-to-dawn needs with motion-triggered lighting for anything used occasionally, like a side yard or gate.
Installing a control isn’t the same as commissioning it. Once fixtures are up, walk through these steps:
- Set motion sensor sensitivity and time delay so lights don’t trigger on passing cars or blowing branches.
- Confirm the photocell faces away from other light sources that could trick it into staying off (or on) at the wrong times.
- Program late-night dimming or full shutoff for hours when nobody’s outside.
- Test dimming at its lowest setting to check for flicker, since some LED drivers behave badly below a certain output.
Commissioning controls after installation is where most residential lighting projects quietly fail. A motion sensor set too sensitively runs all night; a photocell aimed wrong never turns the lights off at all. Get this step right and you cut both your energy use and your contribution to sky glow without touching a single fixture.
Why Kelvin Rating Alone Won’t Fix Your Lighting
A lot of homeowners assume switching to a warmer LED solves the sky glow problem. It helps, but DOE research shows output and distribution often matter more than color temperature. Eliminating uplight entirely and cutting overall lumen output can reduce distant sky glow far more dramatically than shifting a bulb from 5000K to 3000K while leaving it unshielded and blasting upward.
That doesn’t mean color is irrelevant. As a rule of thumb, prefer a color correlated temperature of 3000K or lower where you have the choice, but treat that as the last decision, not the first. Fix aiming and shielding first, cut lumens second, and adjust color temperature third.
If your property backs onto a park, coastline, or known wildlife corridor, look specifically for amber or wildlife-tuned fixtures in the 560 nanometer range and above. These reduce disruption to nocturnal species far more than a standard warm white LED, even one with a low CCT number.
Common Homeowner Mistakes and How to Field-Check Your Install
Most lighting complaints trace back to aim, height, or missing controls, not bulb color. A fixture mounted too high, tilted a few degrees past vertical, or left running all night on a bad sensor setting causes more glare and trespass than any spectrum choice ever will.
Run this inspection the first clear night after installation:
- Walk to your property boundary and look back at the house. If you can see the bare bulb or LED array directly, the fixture needs a shield or a steeper downward angle.
- Check from the public street or sidewalk for the same problem, since that’s the view most likely to draw a complaint or a code violation.
- Test every motion sensor and photocell manually, confirming they trigger, time out, and dim as programmed.
- Inspect reflections off wet pavement, pale siding, or snow, since reflective surfaces can bounce light upward or into neighboring windows even when the fixture itself is aimed correctly.
Pro Tip: Do your night inspection during or right after rain if you can. Wet driveways and pale stucco throw reflected glare that a dry-weather check will never catch.
This is exactly where planning tools earn their keep. Map-based drawing tools let you place fixtures at actual mounting points on your property before installation, creating a detailed specification a contractor can bid against instead of guessing at your intent.
Comparing Common Outdoor Light Types by Their Sky Impact
Not every fixture type carries the same risk of adding to sky glow, and the differences are bigger than most homeowners expect.
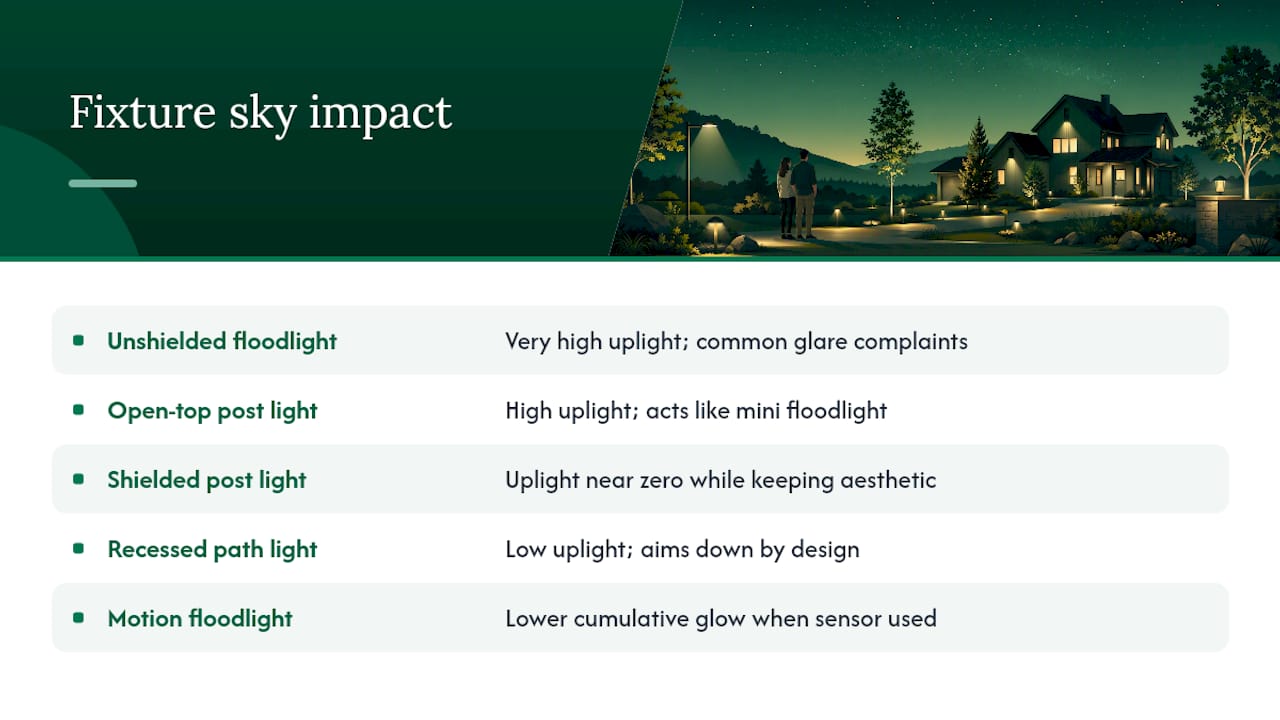
Unshielded floodlights, the barn-style fixture bolted under an eave with no housing around the bulb, are the worst offenders. They send light in every direction at once, including straight up, and they’re the single most common cause of neighbor complaints about glare.
Post lights and lanterns with open tops look charming but function almost like tiny floodlights aimed at the sky. A shielded version of the same fixture, with a solid cap, cuts uplight to nearly zero while keeping the same aesthetic from the street.
Recessed step lights and low-voltage path lights are close to ideal by design. They sit low, aim down by default, and rarely need retrofitting beyond confirming the lens isn’t overly bright for the distance it needs to cover.
Wall-mounted downlights and gooseneck fixtures perform well when mounted at a modest height with a full cutoff shield, but poorly when mounted high and left unshielded, which is the more common installation mistake.
Motion-activated floodlights split the difference. Even an unshielded one causes far less cumulative sky glow than the same fixture run on dusk-to-dawn power, simply because it’s off most of the night. Shielding it too, rather than relying on the sensor alone, is what actually gets you to compliant.
How to Choose Certified Fixtures Across Different Manufacturers
DarkSky maintains a searchable database of approved luminaires across dozens of manufacturers, which is the fastest way to confirm a specific model actually meets program criteria rather than trusting a marketing label that says “dark sky friendly” without backing it up.
That phrase, “dark sky friendly,” isn’t a regulated term. Any manufacturer can print it on a box. When you’re comparing products across brands, ask for three things regardless of what the packaging claims: the BUG rating, the maximum lumen output, and confirmation of full cutoff shielding. A fixture that provides all three in writing is trustworthy even without the formal DarkSky Approved seal, since some smaller manufacturers meet the bar without going through certification.
If a supplier can’t produce photometric data on request, treat that as a warning sign rather than an oversight. Legitimate outdoor lighting manufacturers generate this data as a matter of course because commercial and municipal buyers demand it. A residential-focused catalog that lacks it usually hasn’t been tested to the same standard.
For installation and sourcing help in your area, a contractor partner like Capital Pro Lighting can walk through permanent fixture options and confirm which models on their shelf actually carry the specs you’re asking for, rather than just a favorable-sounding name.
Keeping Your Lighting Dark Sky Compliant Year After Year
Compliant lighting doesn’t stay compliant on its own. LEDs degrade slowly, lenses yellow or crack, and fixtures shift out of aim after a fence gets replaced or a tree branch gets trimmed back.
Check aim and shielding twice a year, ideally at the start and end of daylight saving time changes, since that’s when most homeowners are already adjusting outdoor timers anyway. A fixture that’s drifted even ten degrees off its original angle can start throwing glare it wasn’t designed to produce.
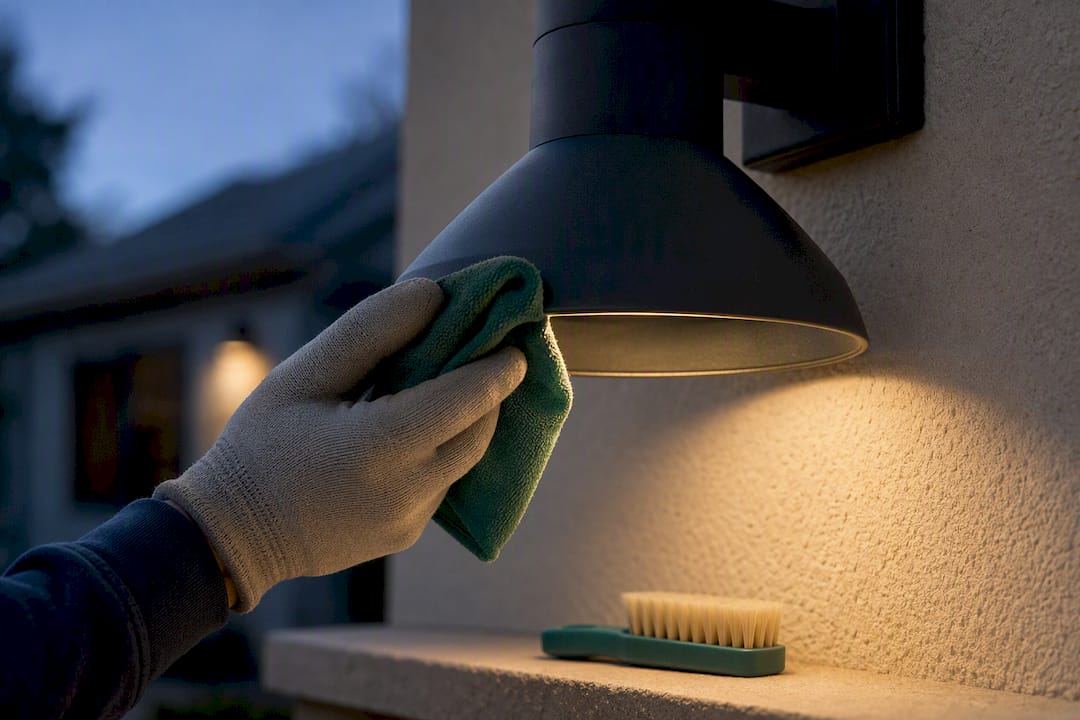
Clean lenses and shields regularly. Dust and grime scatter light in directions the fixture wasn’t engineered for, which oddly enough can make a well-shielded fixture start behaving like a poorly shielded one.
Reprogram motion sensors and photocells seasonally. Sensitivity settings that worked fine in summer foliage often misfire once leaves drop, and a photocell calibrated for winter’s earlier dusk may leave lights off too late in summer if you don’t revisit it.
Finally, treat any landscaping change, a new shed, a taller hedge, a repainted pale wall, as a reason to redo your night walk inspection. The fixture didn’t change, but what it’s reflecting off of did.
Balancing Night-Sky Protection With Safety and Curb Appeal
Small adjustments (aiming a fixture down, adding a timer) usually beat swapping every bulb in the yard for a “dark sky” branded one that’s still mounted wrong. Tighter standards make real sense near parks, coastlines, or migration routes, where even modest spillover matters ecologically. Everywhere else, the priority is visibility where you actually need it and darkness everywhere you don’t. Plan the layout and get a real cost estimate before you buy a single fixture.
— Christian
Plan Your Dark-Sky Lighting Project Before You Buy a Single Fixture
Propertyimprovementestimator gets you a site-specific lighting plan before you ever call a contractor, so you’re pricing your actual yard instead of a generic national average. Draw fixture locations directly on your property’s satellite image with the outdoor lighting estimator, and you get placement, wiring runs, and pole locations mapped against your real dimensions instead of a rough guess.

Run those placements through the lighting cost calculator to get local price ranges for fixtures, poles, and wiring, and check the permit cost calculator if your municipality requires review for exterior lighting changes. Because the plan includes exact measurements and fixture counts, the contractor bids you receive reflect your actual project scope, not a generic per-fixture rate that ignores your yard’s layout. Ready to see what your yard costs to light responsibly? Request a local project report and get matched with contractors who can quote against your finished plan.
Sources
- DarkSky Approved luminaires guidelines | DarkSky International
- Light pollution (National Park Service)
- IES position on legislation and ordinances for outdoor light at night
FAQ
What Does “Dark Sky” Mean in Outdoor Lighting?
It means light that’s useful, targeted, low level, controlled, and warm-colored, following the Five Principles for Responsible Outdoor Lighting. In practice, that means fully shielded fixtures aimed downward, dim enough for the task, and run on a timer or sensor rather than left on all night.
What Are the Best DarkSky Approved Outdoor Lights?
There’s no single best fixture. The safest approach is checking the DarkSky Approved luminaires list for a specific model and confirming it meets your task, whether that’s a path light, a wall sconce, or a security floodlight.
What Lighting Trends Should I Avoid, and What Should I Do Instead?
Avoid tall, unshielded floodlights left on dusk to dawn, and skip decorative post lanterns with open tops that leak light straight upward. Instead, choose shielded, downward-aimed fixtures paired with motion sensors, and size lumen output to the actual task rather than buying the brightest option on the shelf.
What Kind of Lights Are Dark Sky Friendly?
Fully shielded fixtures with no visible bulb, capped lumen output, dimming capability, and warm color temperatures around 3000K or lower generally qualify. Pairing them with timers, photocells, or motion sensors is what actually keeps a compliant fixture compliant once it’s installed.
How Can I Get an Accurate Cost Estimate for Dark-Sky Lighting?
Draw your planned fixture locations on your property using the outdoor lighting estimator to get a site-specific price range based on your yard’s actual dimensions and local costs. That gives contractors a precise scope to bid against instead of a rough per-fixture guess.
Recommended
- Outdoor Lighting Cost Calculator | Fixtures, Poles, Wiring, and Local Costs
- Outdoor Lighting Permit Cost Calculator | Electrical, Poles, Trenching, Glare, and Local Review
- Outdoor Lighting Labor Cost Calculator | Poles, Fixtures, Wiring, Trenching, Controls, and Local Wages
- Outdoor Lighting Material Cost Calculator | Fixtures, Poles, Heads, Wiring, and Controls